updated July 14, 2026
Do you have a question not covered in the FAQ? Feel free to submit your question via the Ask a Question form and a DE support member will contact you in a timely manner.
The Bear Cub Hub Training and Support Options
Live recorded training
Aug 11, 10-11 am. Register Here. This training will cover all the Bear Cub Hub basics. The recording will be posted to the Faculty Guides page on the SIS website.
Canvas course step-by-step
This self-paced training will walk you through the basics of the Cub Hub: login, navigation, accessing rosters, sending class emails, how waitlists work, how to add/drop, census, and submitting grades. Coming soon!
Walk-In / Zoom drop-In hours
Bring us your questions in-person or on Zoom. First week of fall semester (8/17-21), 10-11 am and 3-4 pm Monday-Friday. Location: The Center for Excellence in Teaching and Learning (CETL), 3rd Floor of Doyle Library or Zoom Appointment Link.
- How do I access the Bear Cub Hub?
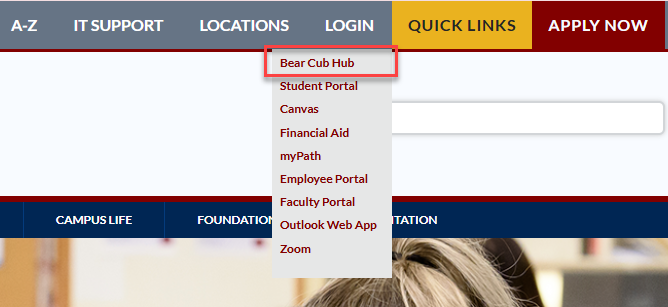
Go to the SRJC homepage. Go the the "LOGIN" text and hover over the word.
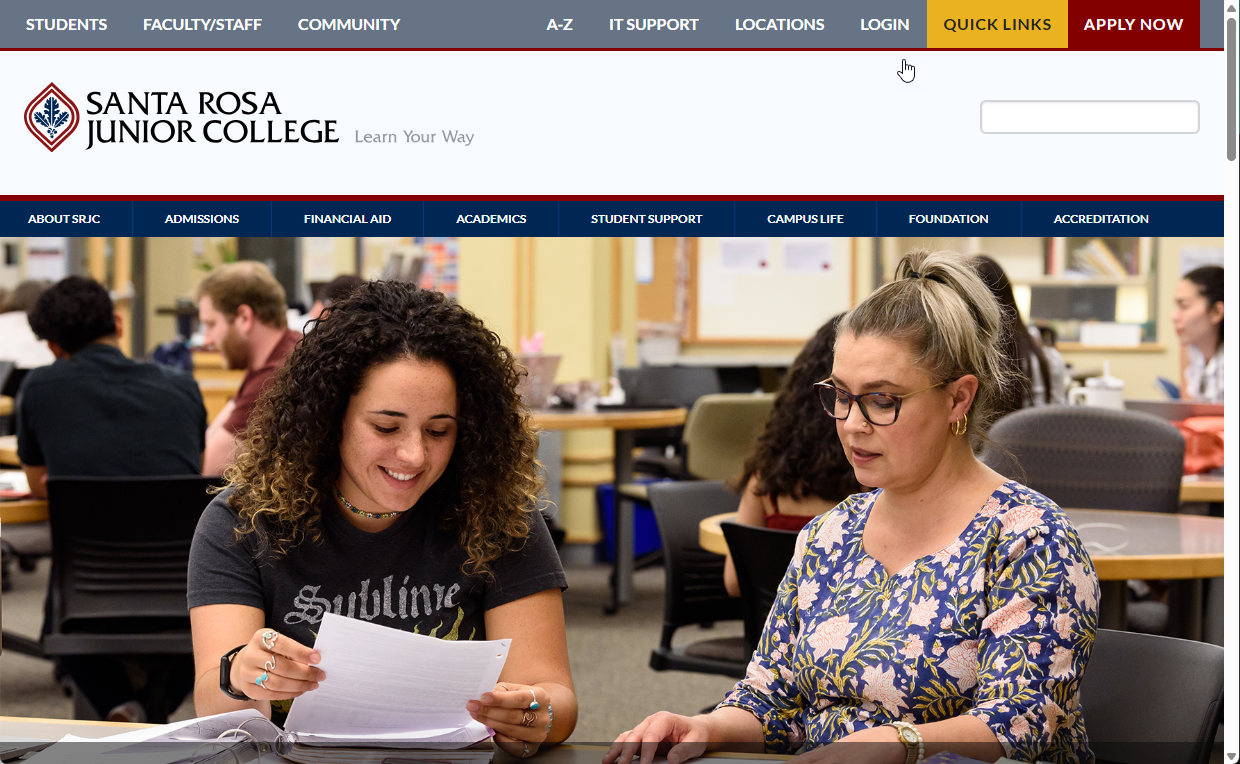
Move down and select "Bear Cub Hub" from the menu.
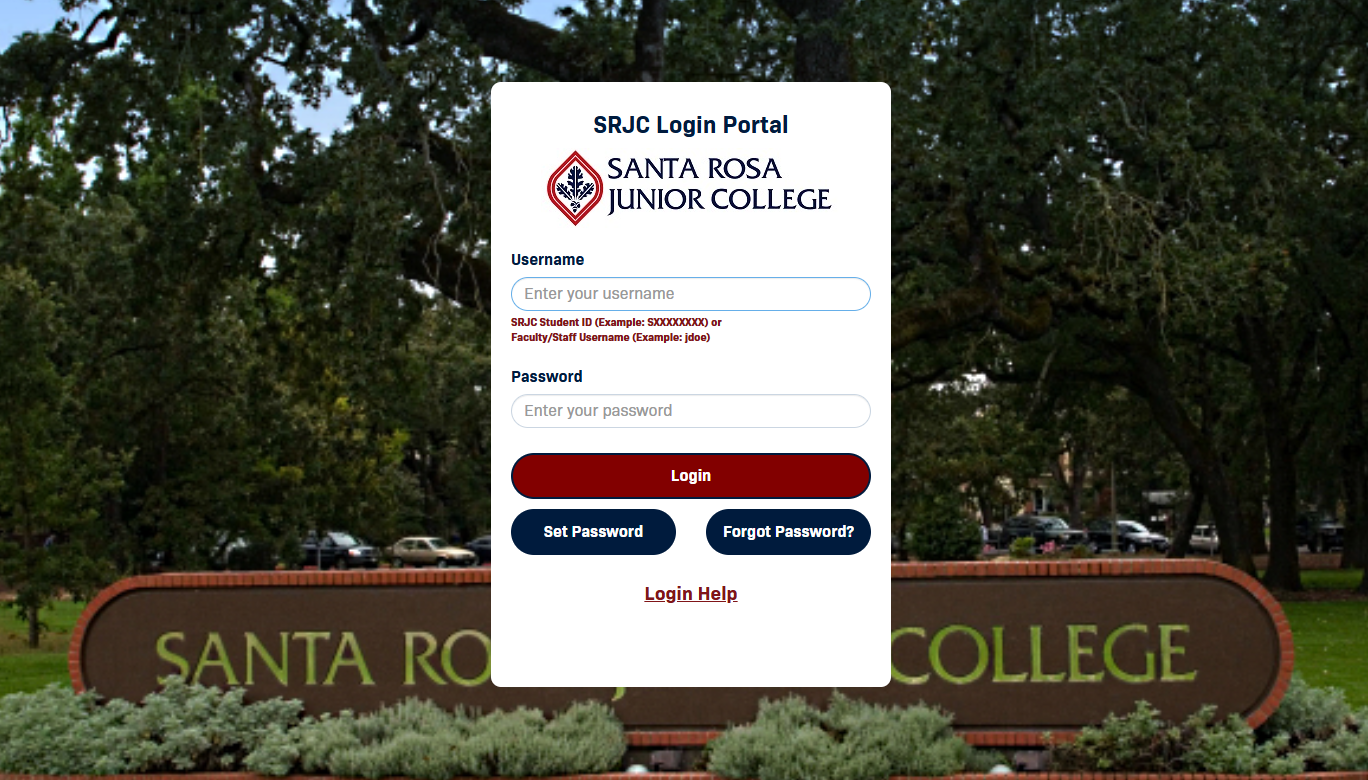
Use your existing Single Sign-On (SSO) credentials. You do not need to reset your password.
You can go to the Bear Cub Hub Login Page and log into the portal using your credentials.
- Why do students have different login instructions than employees?
Students currently use their Student ID # to access all applications at SRJC. Now that we have transitioned to a new SIS and related database all Student ID #s have changed. In contrast, employees currently authenticate with their SRJC username associated with their @santarosa.edu email, which is not impacted by the migration to Banner.
- Will Canvas login for Faculty change?
No. Faculty will continue to use their SRJC username to authenticate into Canvas.
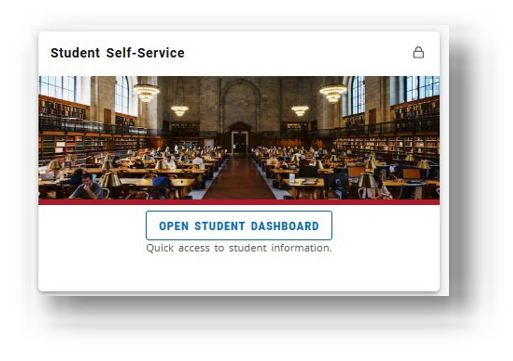
- What are “cards” in Bear Cub Hub?
Cards are the main way to access tools and services. Each card corresponds to a specific function, such as registration, grades, or faculty tools.
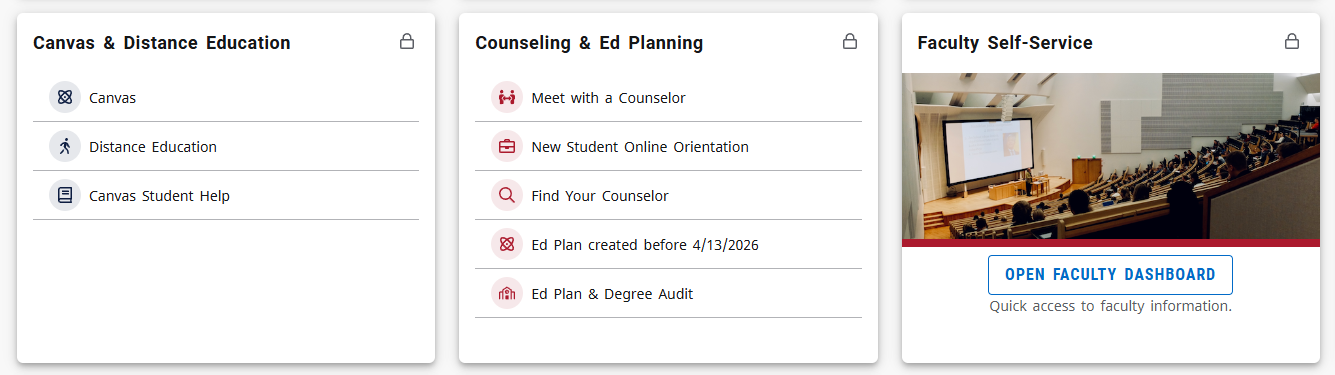
- Why do my Bear Cub Hub cards look different from someone else’s?
Cards are personalized based on your role (student, faculty, staff). Some cards may appear in different places or be required (locked) depending on your access.
- Why can’t I access certain features yet?
Some features may not be available until services (such as registration) are open or system updates are complete.
- Can I use Bear Cub Hub on my phone or tablet?
Yes. Bear Cub Hub adjusts to your screen size and will display cards in a vertical layout on mobile devices.
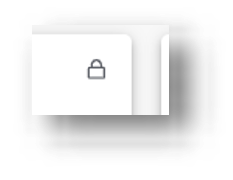
- What does the lock icon on a card mean?
A lock icon means the card is required for your role and cannot be removed from your home page
- How do I add or remove cards from my home page?
Use the flag icon on a card to add or remove it from your home page. In the picture below, the Banner Search card has been flagged or added as a "favorite" and will appear on the Bear Cub Hub home page.


You can also select “View All Cards” to browse available options.

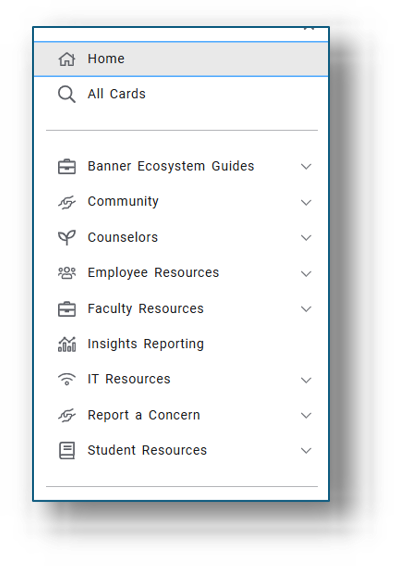
- What is the menu icon (three lines) in the top corner?
This menu provides a list of links and resources. The options you see will depend on your role at SRJC. This is sometimes called a "hambuger" icon.

Here is an example of what a menu might look like when the icon is selected.
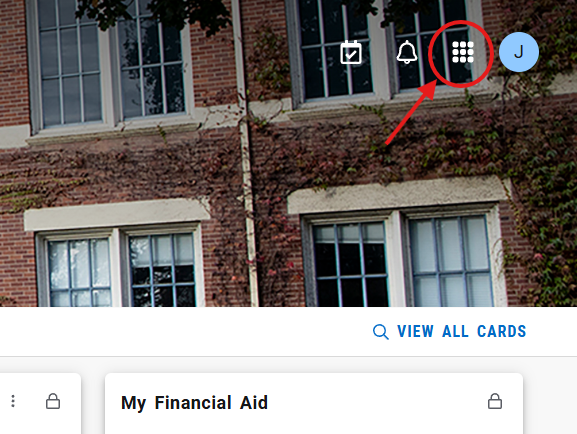
- What is the “waffle” icon?
The waffle icon opens additional applications available to you. Not all users will have access to every application.
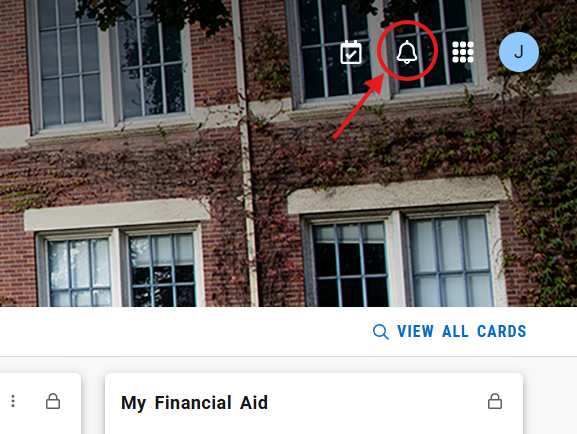
- What are notifications and tasks?
Notifications share updates. The notification icon is an icon of a bell and can be found in the corner of the Bear Cub Hub landing page.
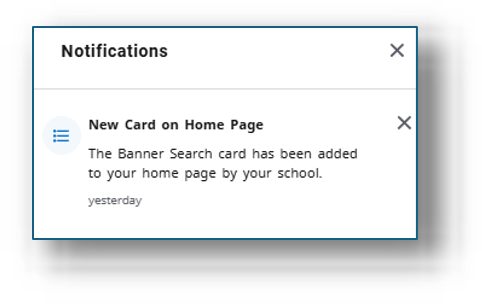
Pictured below is an example of Notifications faculty may receive.
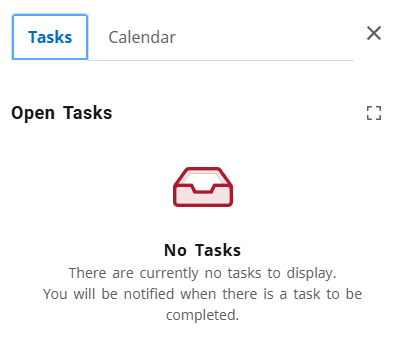
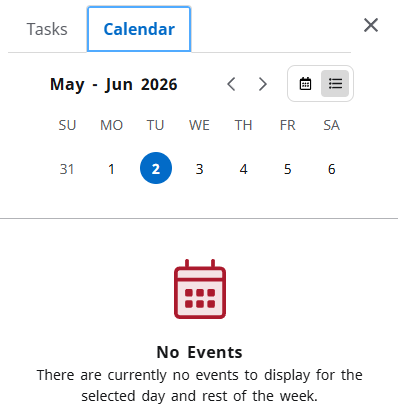
Tasks highlight items that may require action and may include a number indicator. The task icon is a calendar icon that is located in the corner of the Banner landing page, next to the notifications icon.
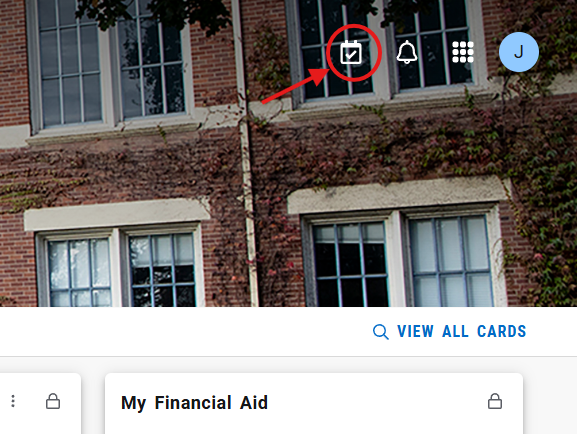
Pictured below is an example of the sample tasks and calendar options.
- How do I get back to the main page?
Select the Bear Cub Hub logo at the top of the screen to return to the home page at any time.

- Where can I find my classes and rosters?
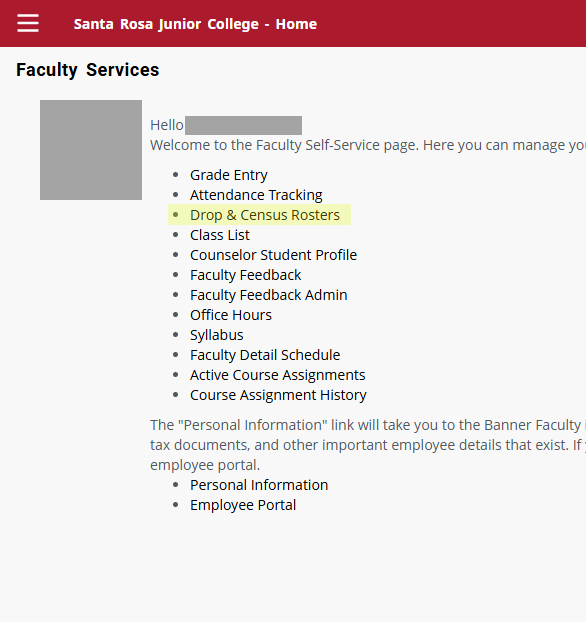
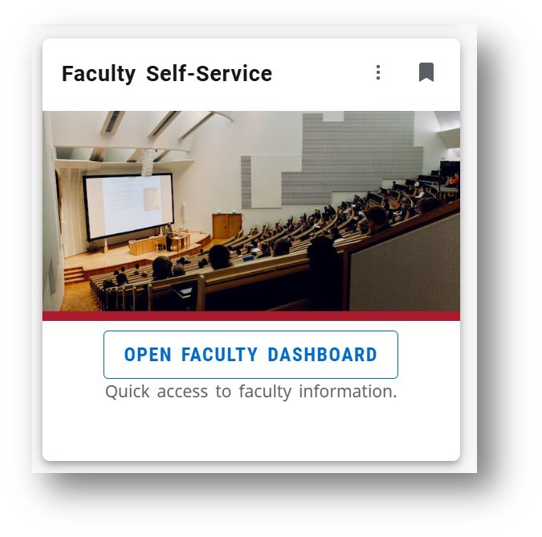
- To find your classes and rosters, locate the Faculty Self-Service Card on the landing page after you log into the Bear Cub Hub.
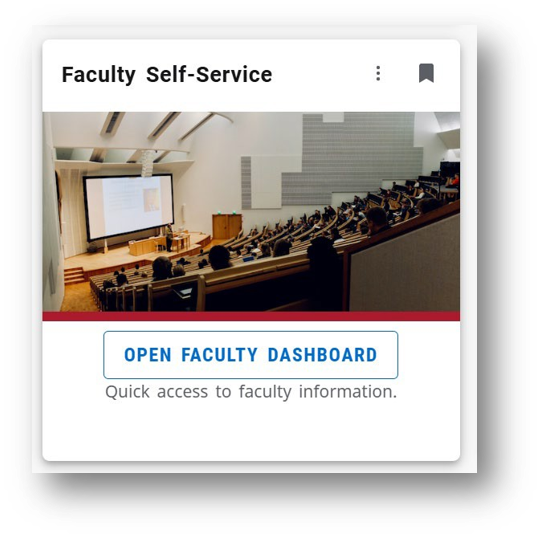
- To access the Faculty Dashboard, click on the card.
- Once you've accessed the dashboard, click on "Class List."
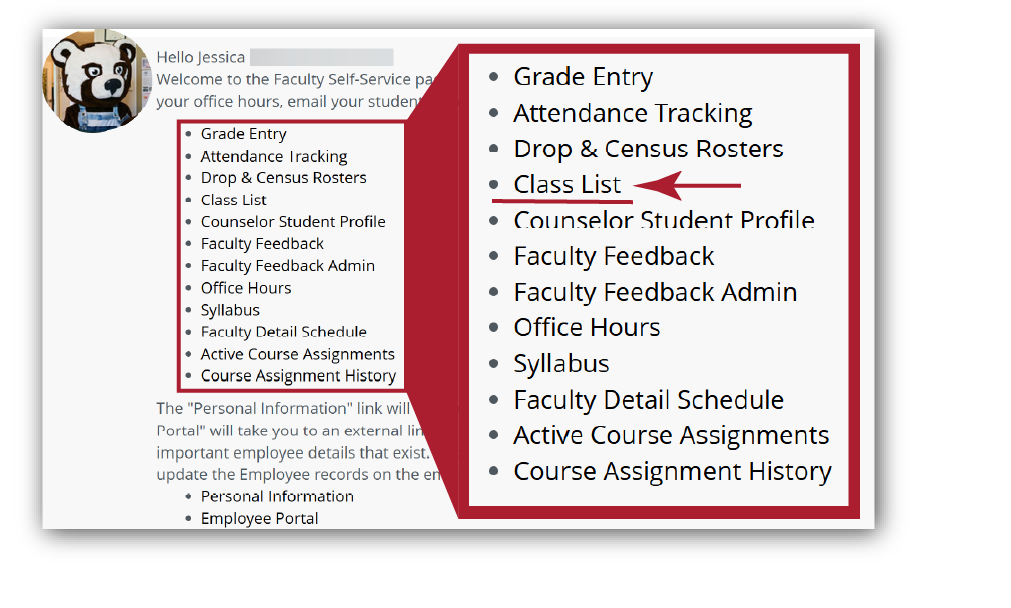
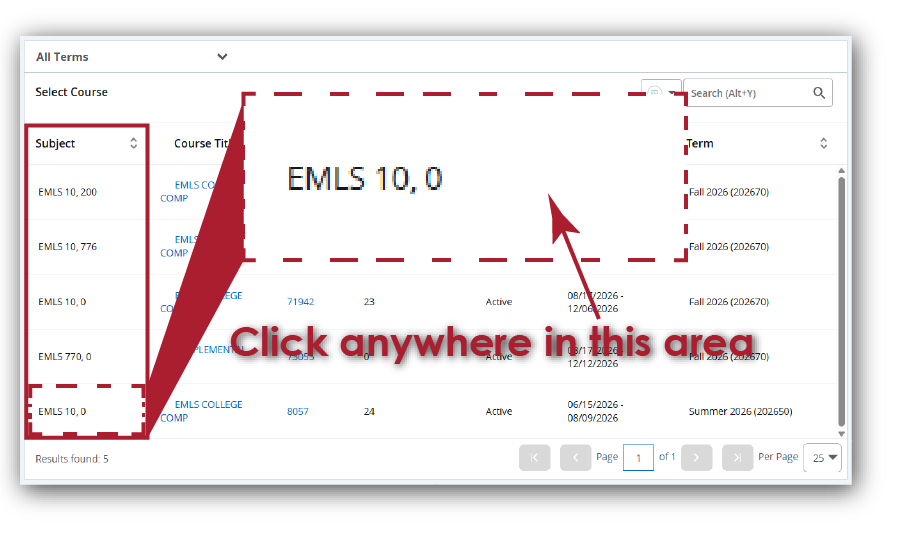
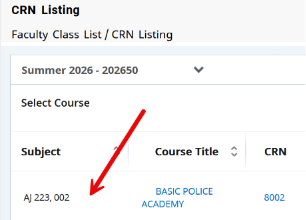
- Your classes will be listed. To access the class roster, click on the course under the "Subject" column.
- After clicking on the class, the roster of students enrolled in the class will appear.
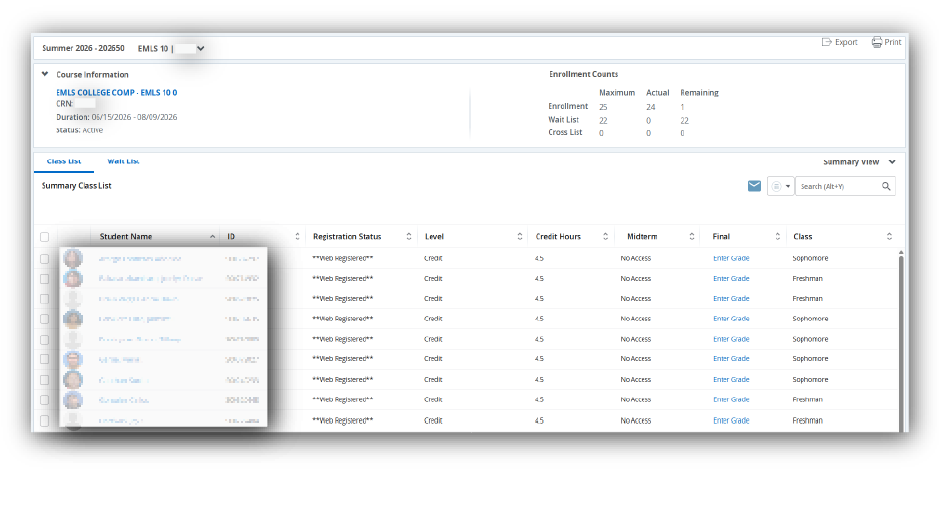
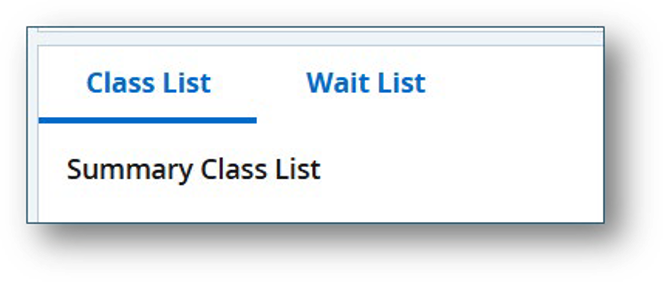
- Choose to view the class lists (enrolled) or the waitlist (not enrolled).
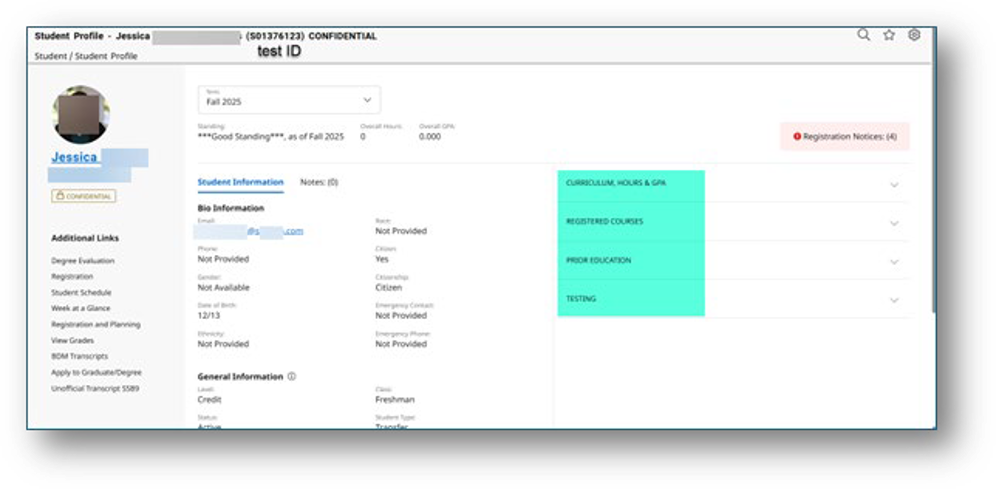
- If a student has a picture on file, you can hover your cursor over their name, and a pop-up window will appear with their picture.
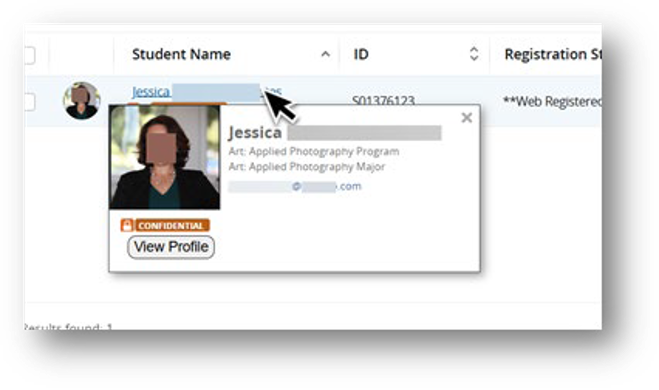
- If you click on their hyperlinked name, it will open their student profile in a new web browser. The green-highlighted drop-down items are visible to faculty.
- To find your classes and rosters, locate the Faculty Self-Service Card on the landing page after you log into the Bear Cub Hub.
- How do I email my students?
- From the Faculty Dashboard, click Class List.
- Select the Term.
- Click the blank area to the right of the course number.
- Choose to view the Class List (enrolled) or the Wait List (not enrolled).
- Select which students you want to email using the left check boxes (the top check box selects all students), then select the blue envelope icon above and to the right of the student list.
- Once you select the envelope, a new email will open in the default email application you have configured on your computer. It may default to sending the email from your personal email address rather than your SRJC email address. This can be confirmed in the “From” line of the email that opens. If your personal email appears there, see the instructions below for help in setting your SRJC email (Outlook) as the default email program on your computer.
- If you select 2 or more students, their addresses will be placed in the BCC line.
- Click the Send button to send your email.
*Tip: For help with changing your computer's default email address, see this guide for Mac users or this guide for Windows users or contact the IT Help Desk any time between 8am-5pm.
Alternatively, you can message your currently enrolled students via the Canvas Inbox. You must publish the relevant Canvas course before the system will allow you to message your students.
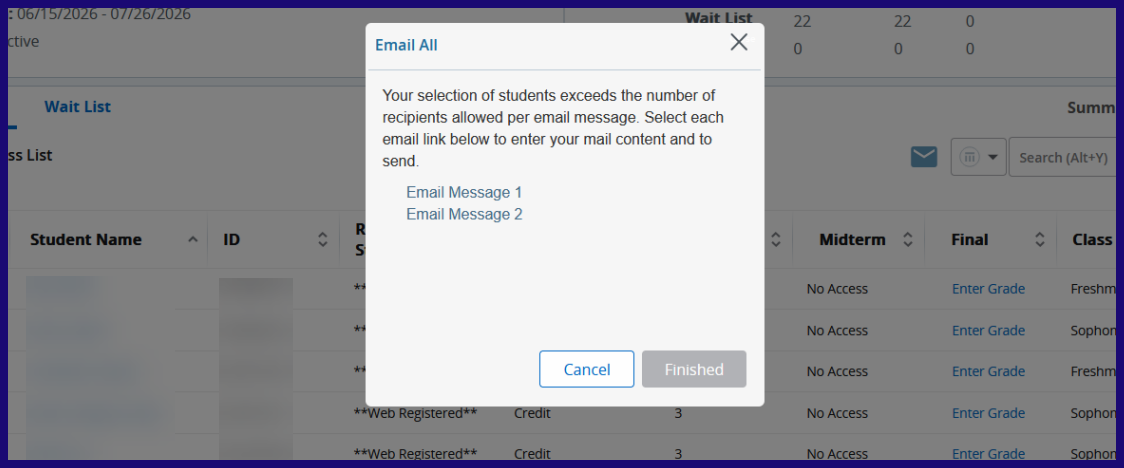
- Is there a limit to how many students I can email at one time via the Cub Hub?
Yes. The limit depends on which email system you are using. If you are using Outlook, the maximum number is 62. The system will prompt you to send 2 or more emails if your class has more than 62 students enrolled. Below is a screenshot of this message.
- How do waitlists work?
Students on the waitlist are not registered for the class, and the system does not automatically register them when a seat opens. The system sends them an email telling them that a seat has opened and that they have 24-hours to register, and provides registration instructions. The system will stop sending these emails 24-hours before the first day of the class (as listed in the schedule). After that point, students would need to use an Authorization (Add) Code to enroll in the class (see information below).
Waitlists - before the class begins:
When a class is full, a student can add themselves to the waitlist. When someone drops the class and there is an open seat, the system automatically emails the student at the top of the waitlist informing them that they have 24 hours to register for the class. If that student does not register within that time window, the system continues down the waitlist. If the student misses that 24-hour window, they have to start the process over again, adding themselves to the bottom of the waitlist. The system sends the last of these emails 24 hours before the class start date listed in the schedule.
Waitlists - after the class begins:
On the first day of class, the waitlist’s automatic process is halted but the list is still viewable by instructors. Instructors can view the waitlist and send authorization (add) codes to students. Students then need to drop themselves from the waitlist and use the authorization code to register for the class.
- How do I use the Authorization (Add) Codes?
Authorization codes (previously called add codes) are generated 1 week before classes begin. Faculty can then provide them to students who can use them starting on the first day of that class as listed in the course schedule.
How to access and use authorization codes (instructor):
- From the Faculty Dashboard, select Faculty Detail Schedule.
- Select the term and CRN (course section number),
- Scroll down to the bottom of the page where you will see the Authorization Codes list.
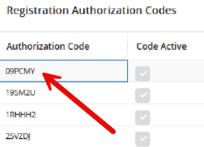
- Send or give an authorization code to your student. Note that the gray checkmarks do not indicate the status of the code – faculty can provide a code with a gray checkmark.
- The “Code Active” checkmarks will remain gray, even after a code is successfully used, but the information related to the student who used each code will populate in the list.
Note: you may consider distributing authorization codes in the order that students appear on your waitlist.
- How do students use authorization (add) codes?
This section is to help you better understand how students utilize authorization codes/add codes. This information is available in the Student FAQ for Bear Cub Hub.
- From the Student Dashboard, select Browse, Plan and Register for Courses.
- Select Register for Classes.
- Select the Term and click Continue.
- If you are already on the course waitlist, remove yourself by selecting Drop Before Course Starts in the Summary area and click Submit.
- Search for the course you want to add via the Subject or CRN number.
- Click Add next to the course you want to register for.
- A pop-up window will appear. Type the authorization code your instructor has given you into the Authorization Code area and click Confirm.
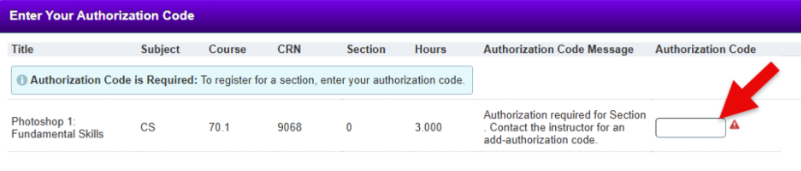
- Click Submit in the Summary area.
- Your Summary will now show you as registered for the class.
- Finally, pay your fees: Start by returning to the Home area of Cub Hub.
- Click View Student Account on the My Student Account Card.
- Follow the prompts to pay your fees.
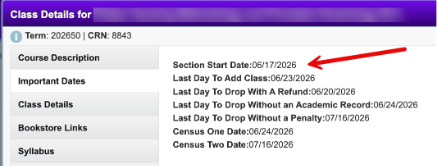
If authorization codes are not working
It’s possible that your course has a later start date, in which case students would not be able to use the authorization codes until that date. You can confirm the start date in Class Details:
- How do I view dropped students?
At this time, we don’t know of a way to view dropped students in Bear Cub Hub. As a workaround, you can go to your Canvas course (even if you’re not using Canvas) and check either the People page where you will see dropped students like this:

Or the Gradebook where you can see dropped students this way:
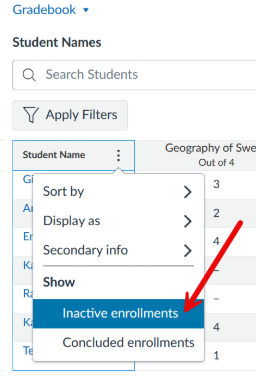
You can also check out this video about how to drop students in Bear Cub Hub that Tara Jacobson created.
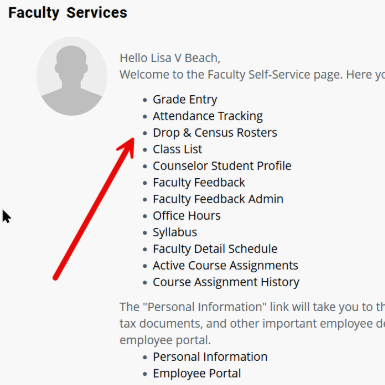
- How do I drop no-shows?
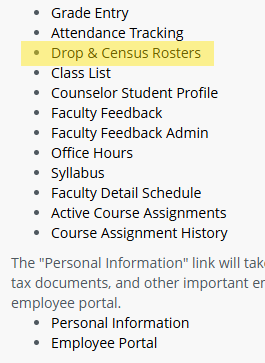
Log into Bear Cub Hub and access the Faculty Self-Service Dashboard. Select "Drop & Census Rosters"

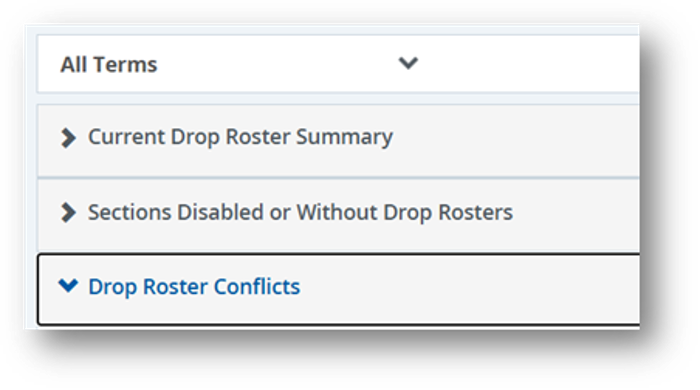
Click on Current Drop Roster Summary.
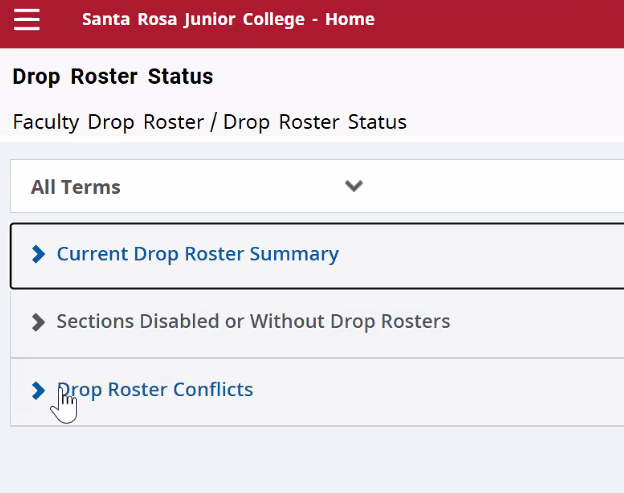
This part is not intuitive, you have to click on the white space, not hyperlinks.
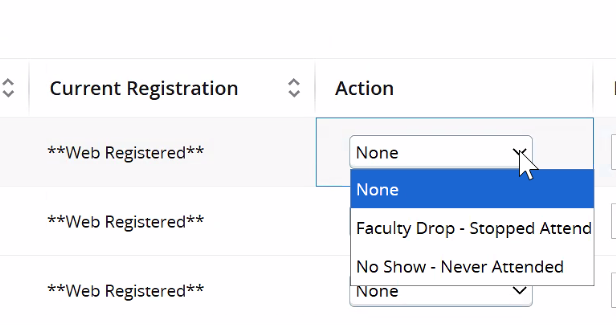
Toggle to the action drop down menu.
Scroll down and click submit. You’re not done yet.
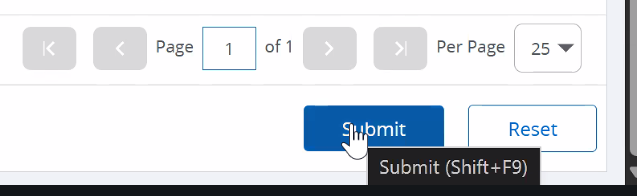
Scroll down and click confirm.
- How do I review census dates?
The Drop & Census Rosters allow you to review census dates and drop students from courses as needed. Select Drop & Census Rosters on the Faculty Self-Service landing page.
Then, select the term and the menu item you’d like to view.
The census date will be listed for the course along with the status of the census.

- How do I certify my roster? (How do I complete my census?)
In Banner, a completing a census for your class is synonymous with certifying your roster. Previously, a roster was certified once a semester, and was available until the end of the class. In Banner, a census is only open during a defined window, and the census must be completed by the posted date.
Accurate active enrollment helps our teams around the college keep track of student statuses for things like financial aid or participation on SRJC sports teams.
To complete the census (certify your roster), select "Drop & Census Rosters" from the Faculty Dashboard.
*BEFORE YOU CERTIFY YOUR ROSTER, please ensure you have dropped no shows or students that have stopped coming to class. This process is listed in the "How do I drop no-shows?" dropdown.
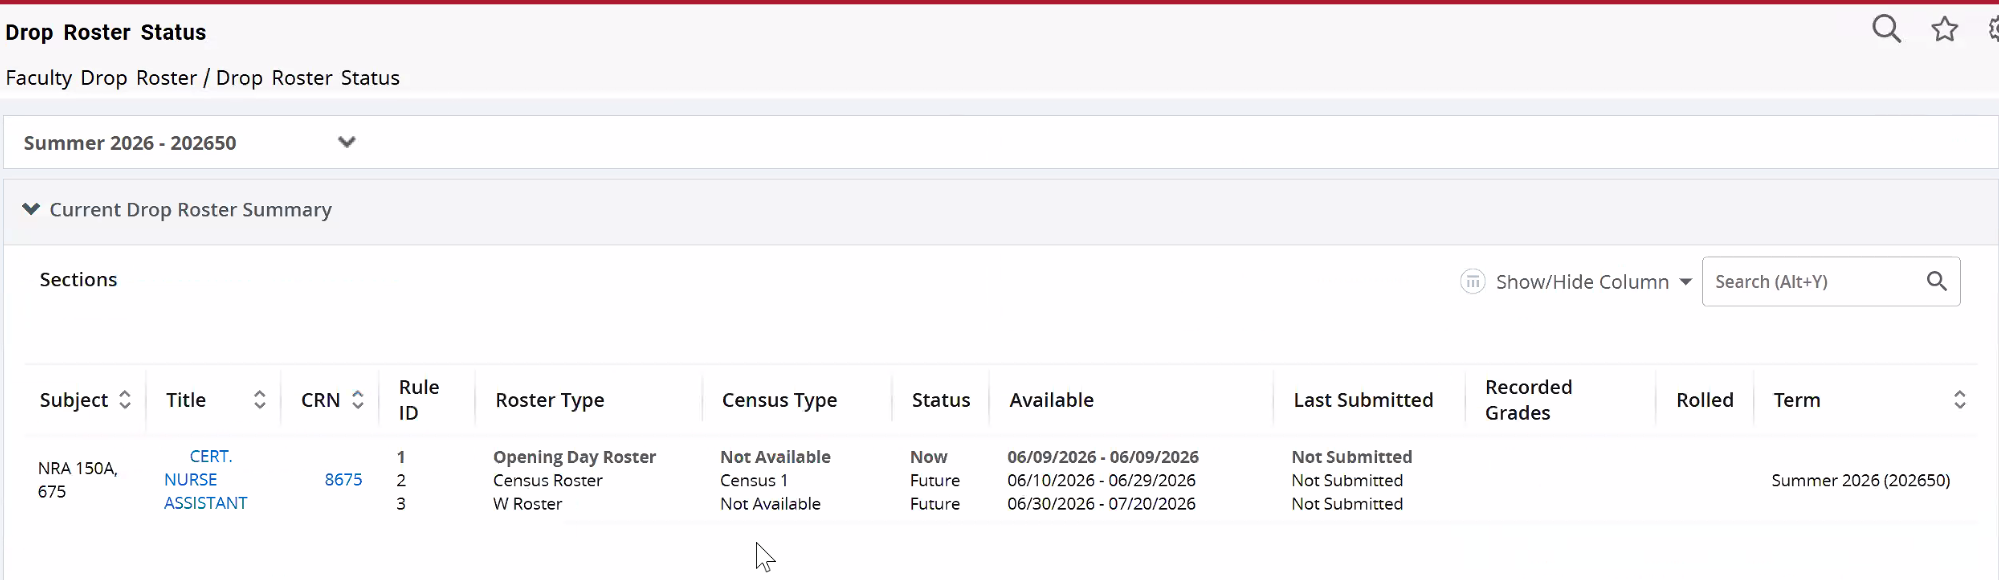
The Drop Roster page will have all your classes that are active on the schedule that students can enroll in.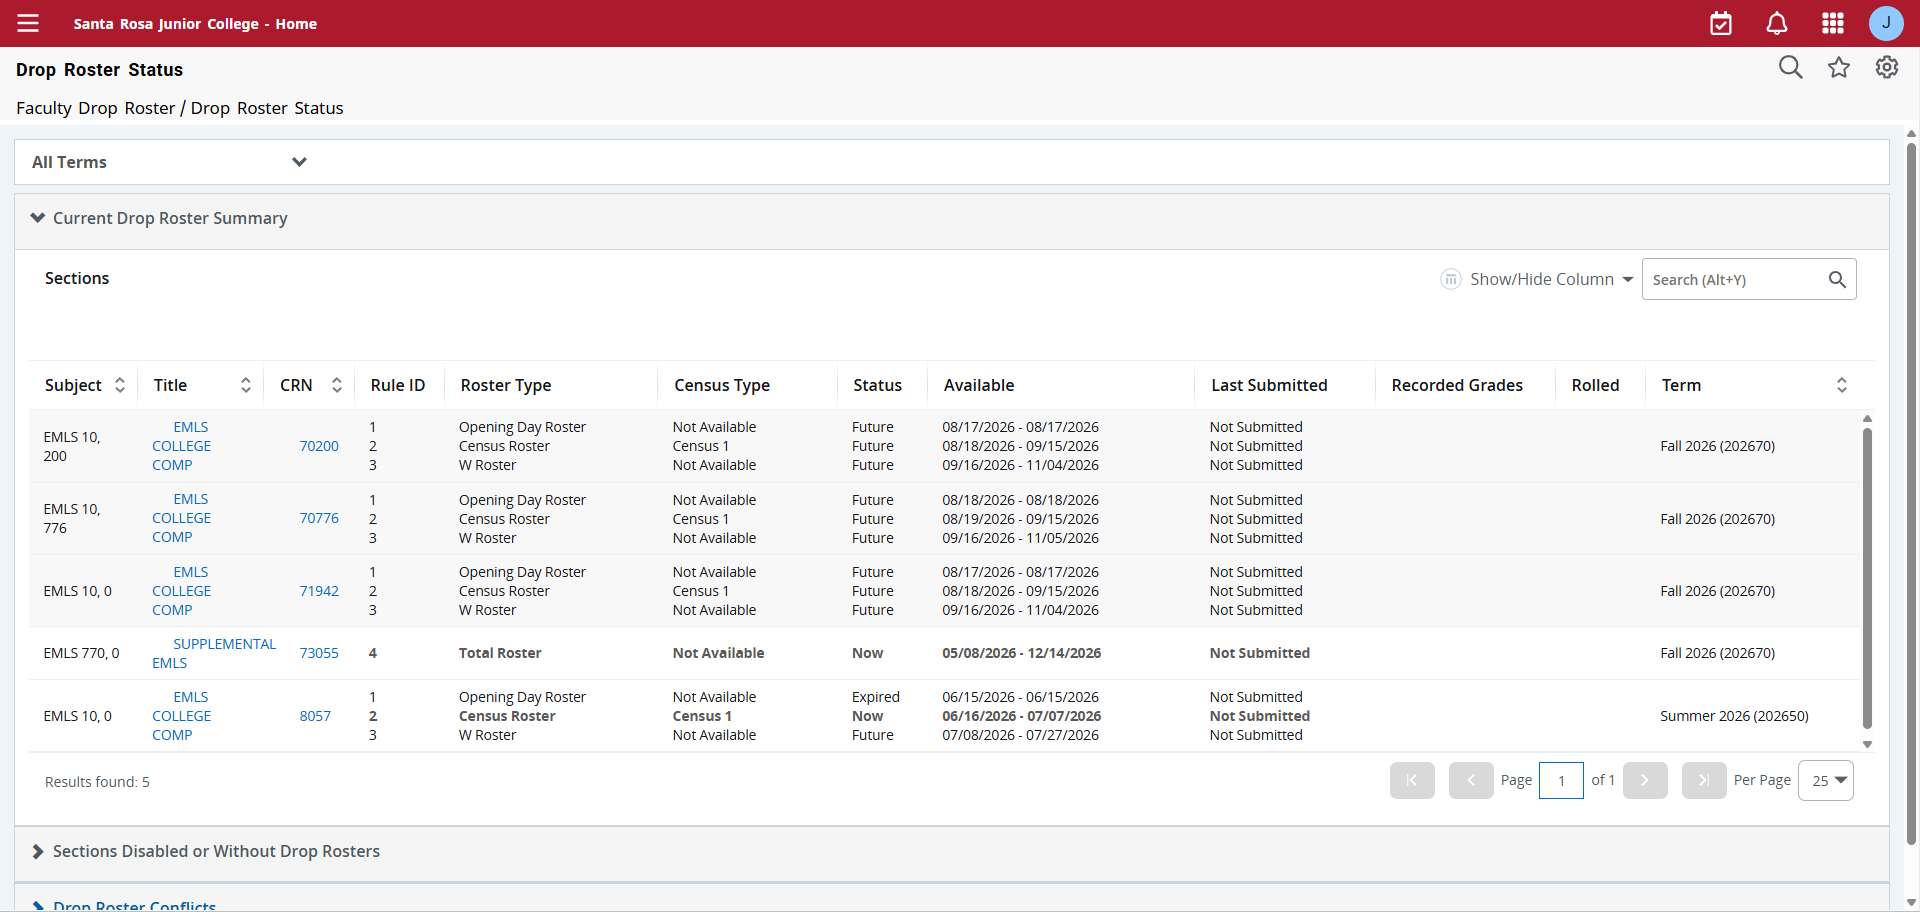
From this page, you can choose the class that you would like to complete a census for (aka certify a roster).

At a closer glance, the information will tell you the different type of censuses that are available. The "Census Roster" is the census that is synonymous with certifying a roster. The "Status/Availability" column will tell you when you can complete your census/certify your roster.
PLEASE NOTE: YOU MUST COMPLETE YOUR CENSUS/CERTIFY YOUR ROSTER BY THE DATE LISTED IN STATUS/AVAILABILITY.
The "Last Submitted" column will note submitted censuses.
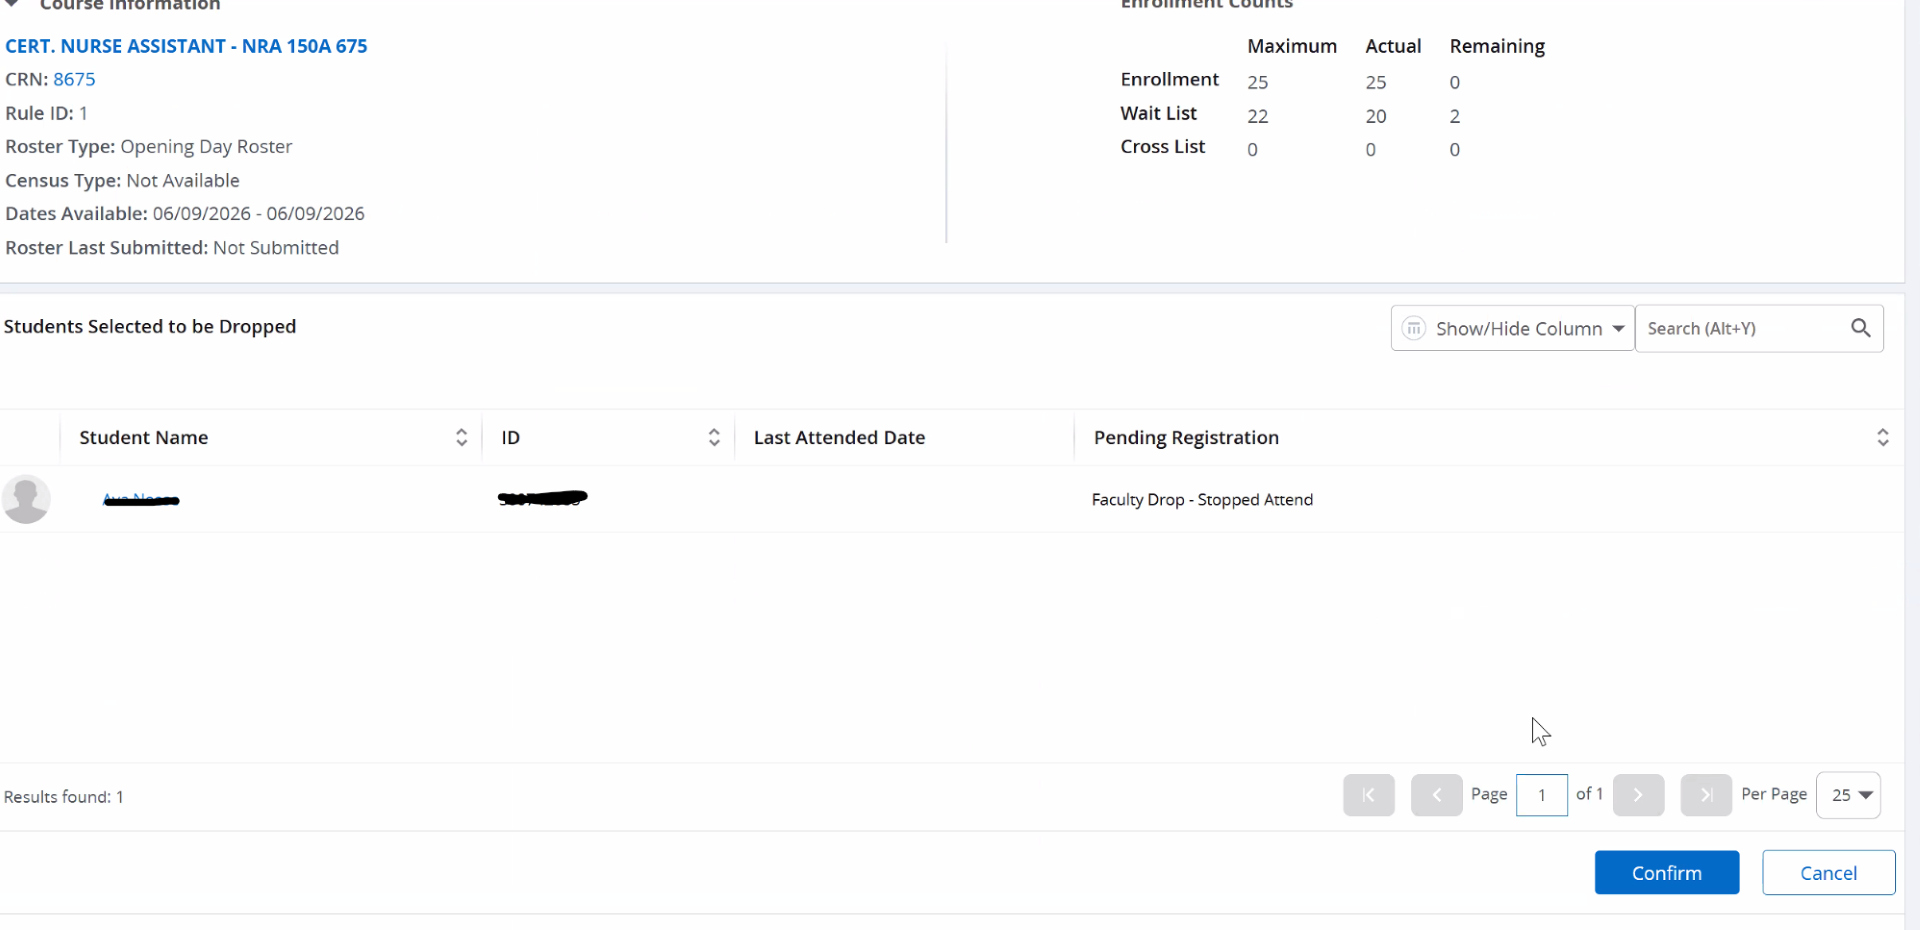
After you click on the class you wish to complete a census for, you will be taken to that class's "Drop Roster Maintenance" page.
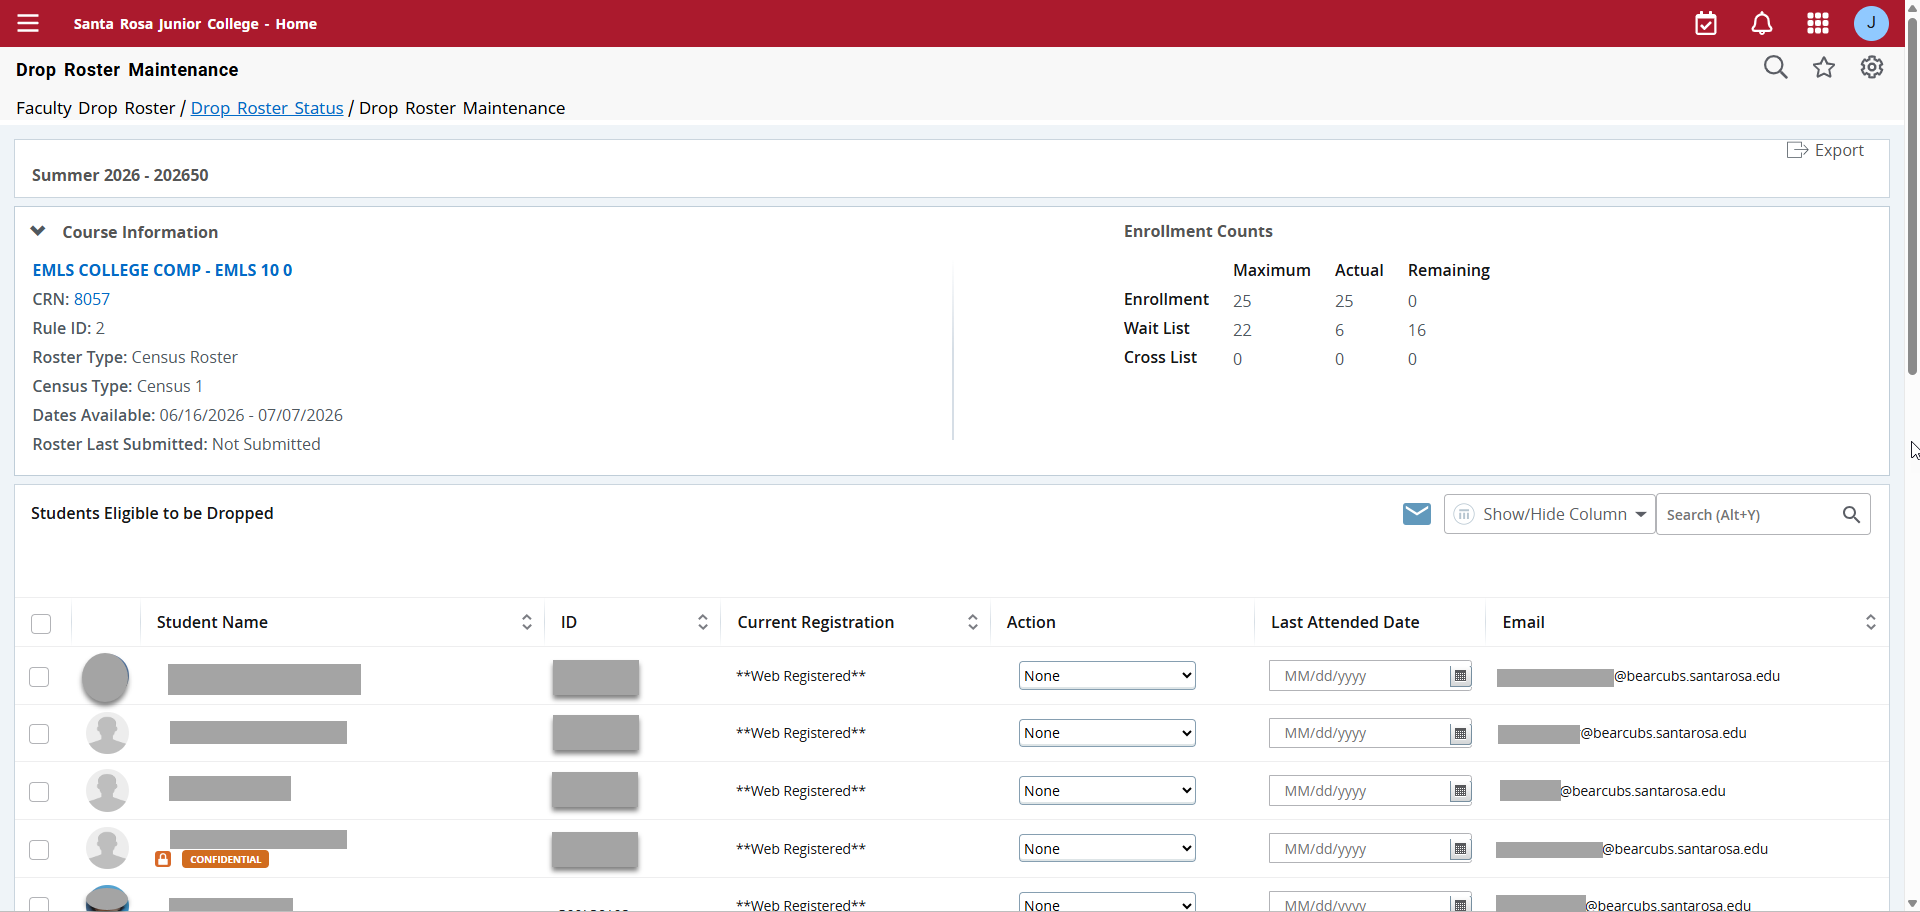
This census page will list all of the students on the official roster. Scroll to the bottom of the page.

Click on "Submit" to submit the roster.
Next, the screen will list that there are no students to drop.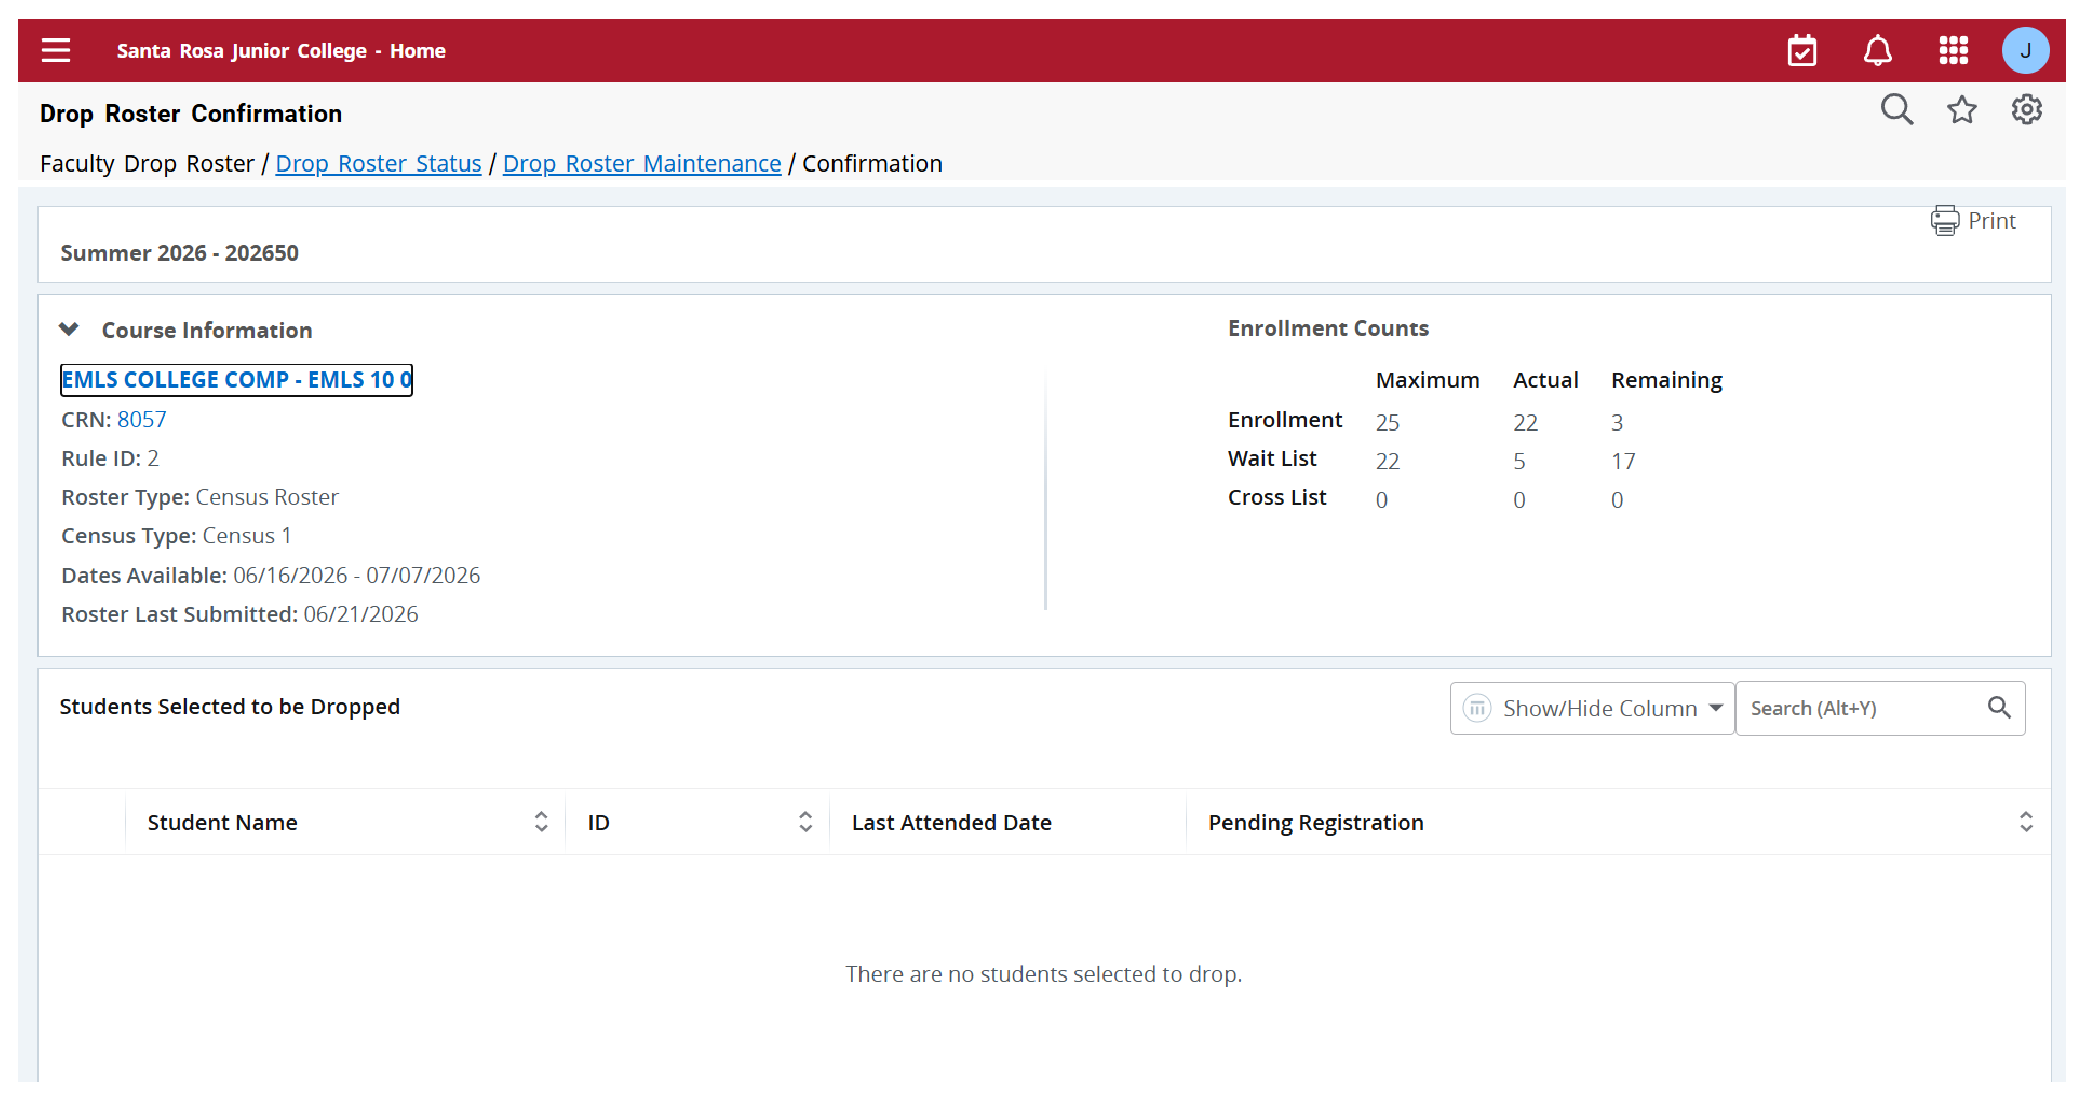
Scroll to the bottom of the page and click on "Confirm."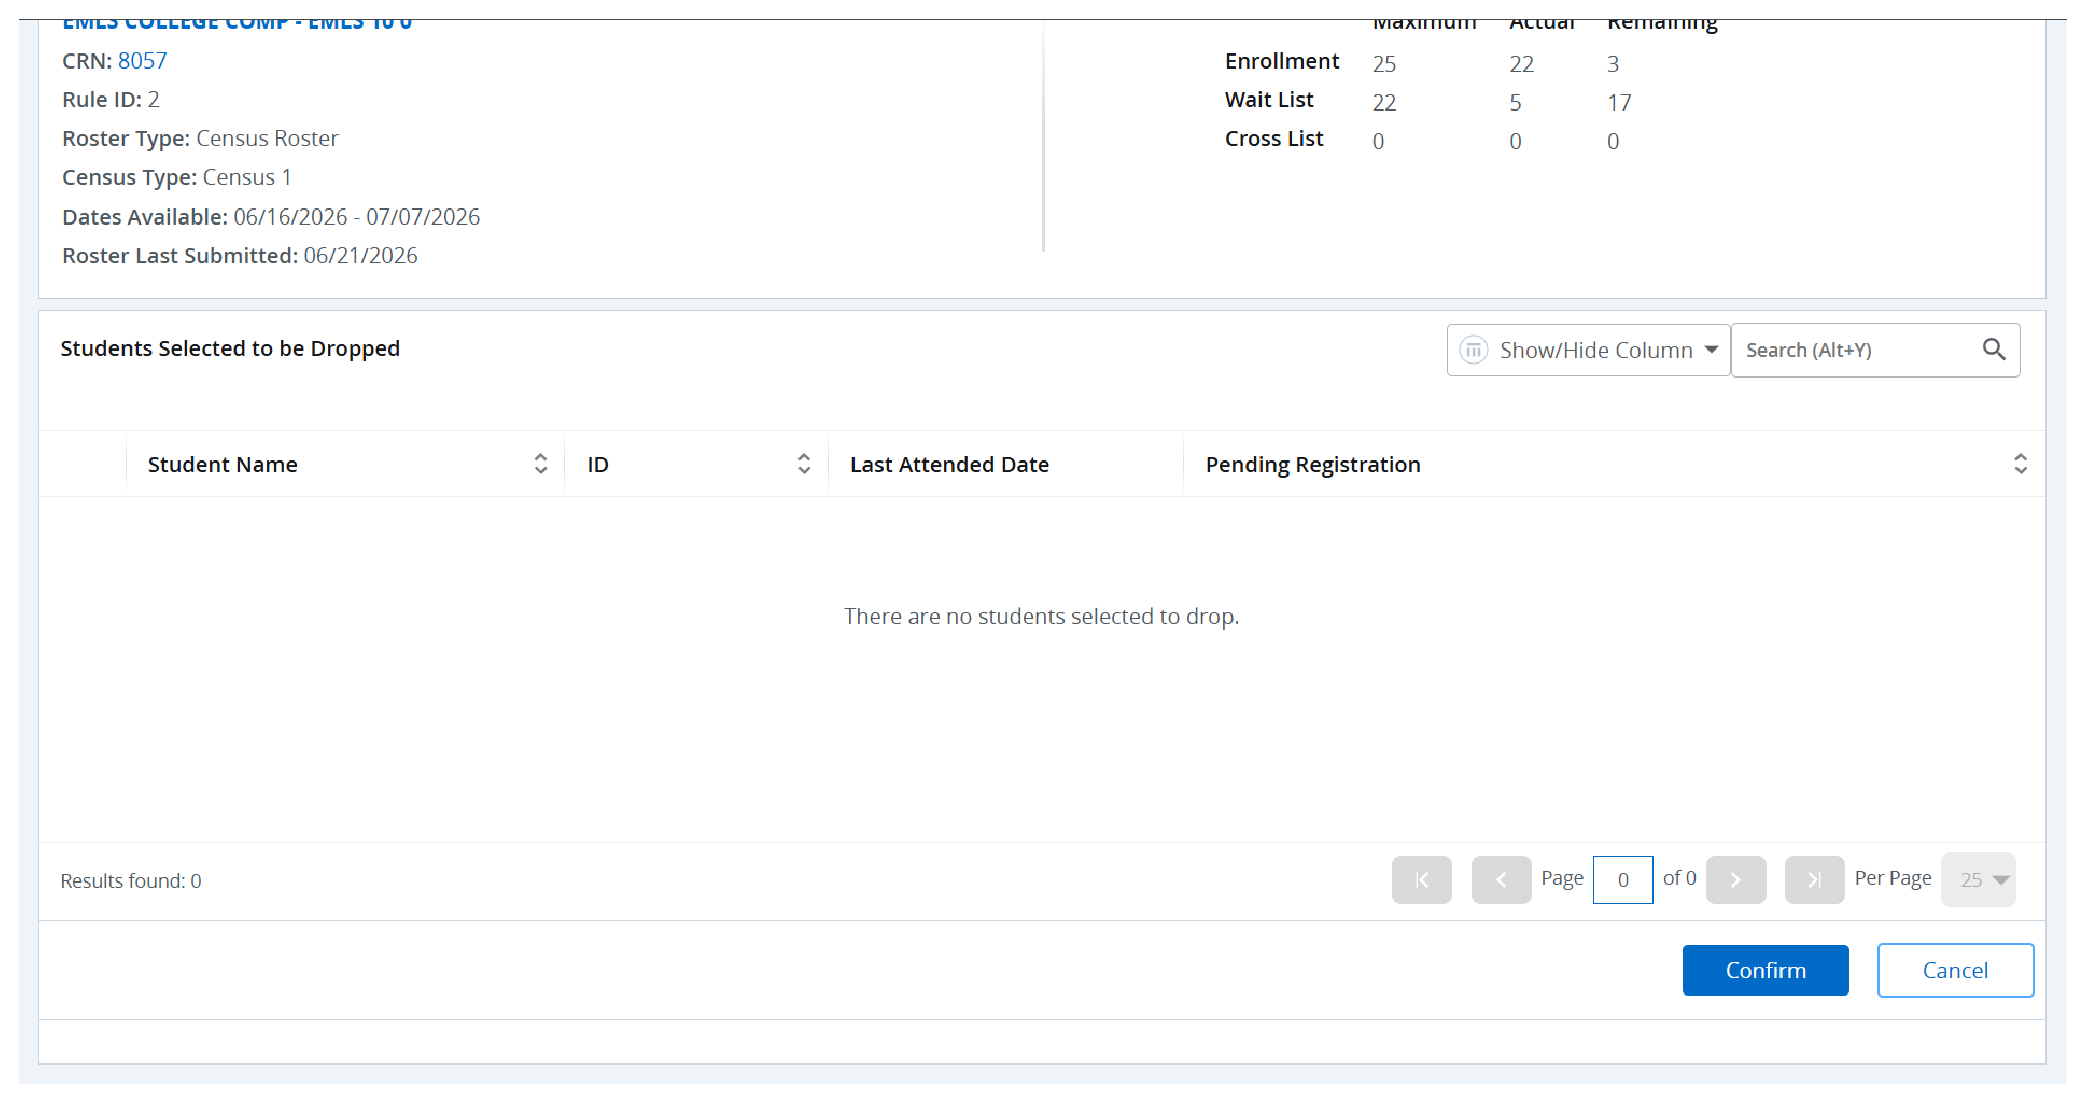
After you click "Confirm," in the location where the "Confirm" button was previously located a button should now say, "Back to Maintenance." Click on this button to return to the Drop Roster Status Page.
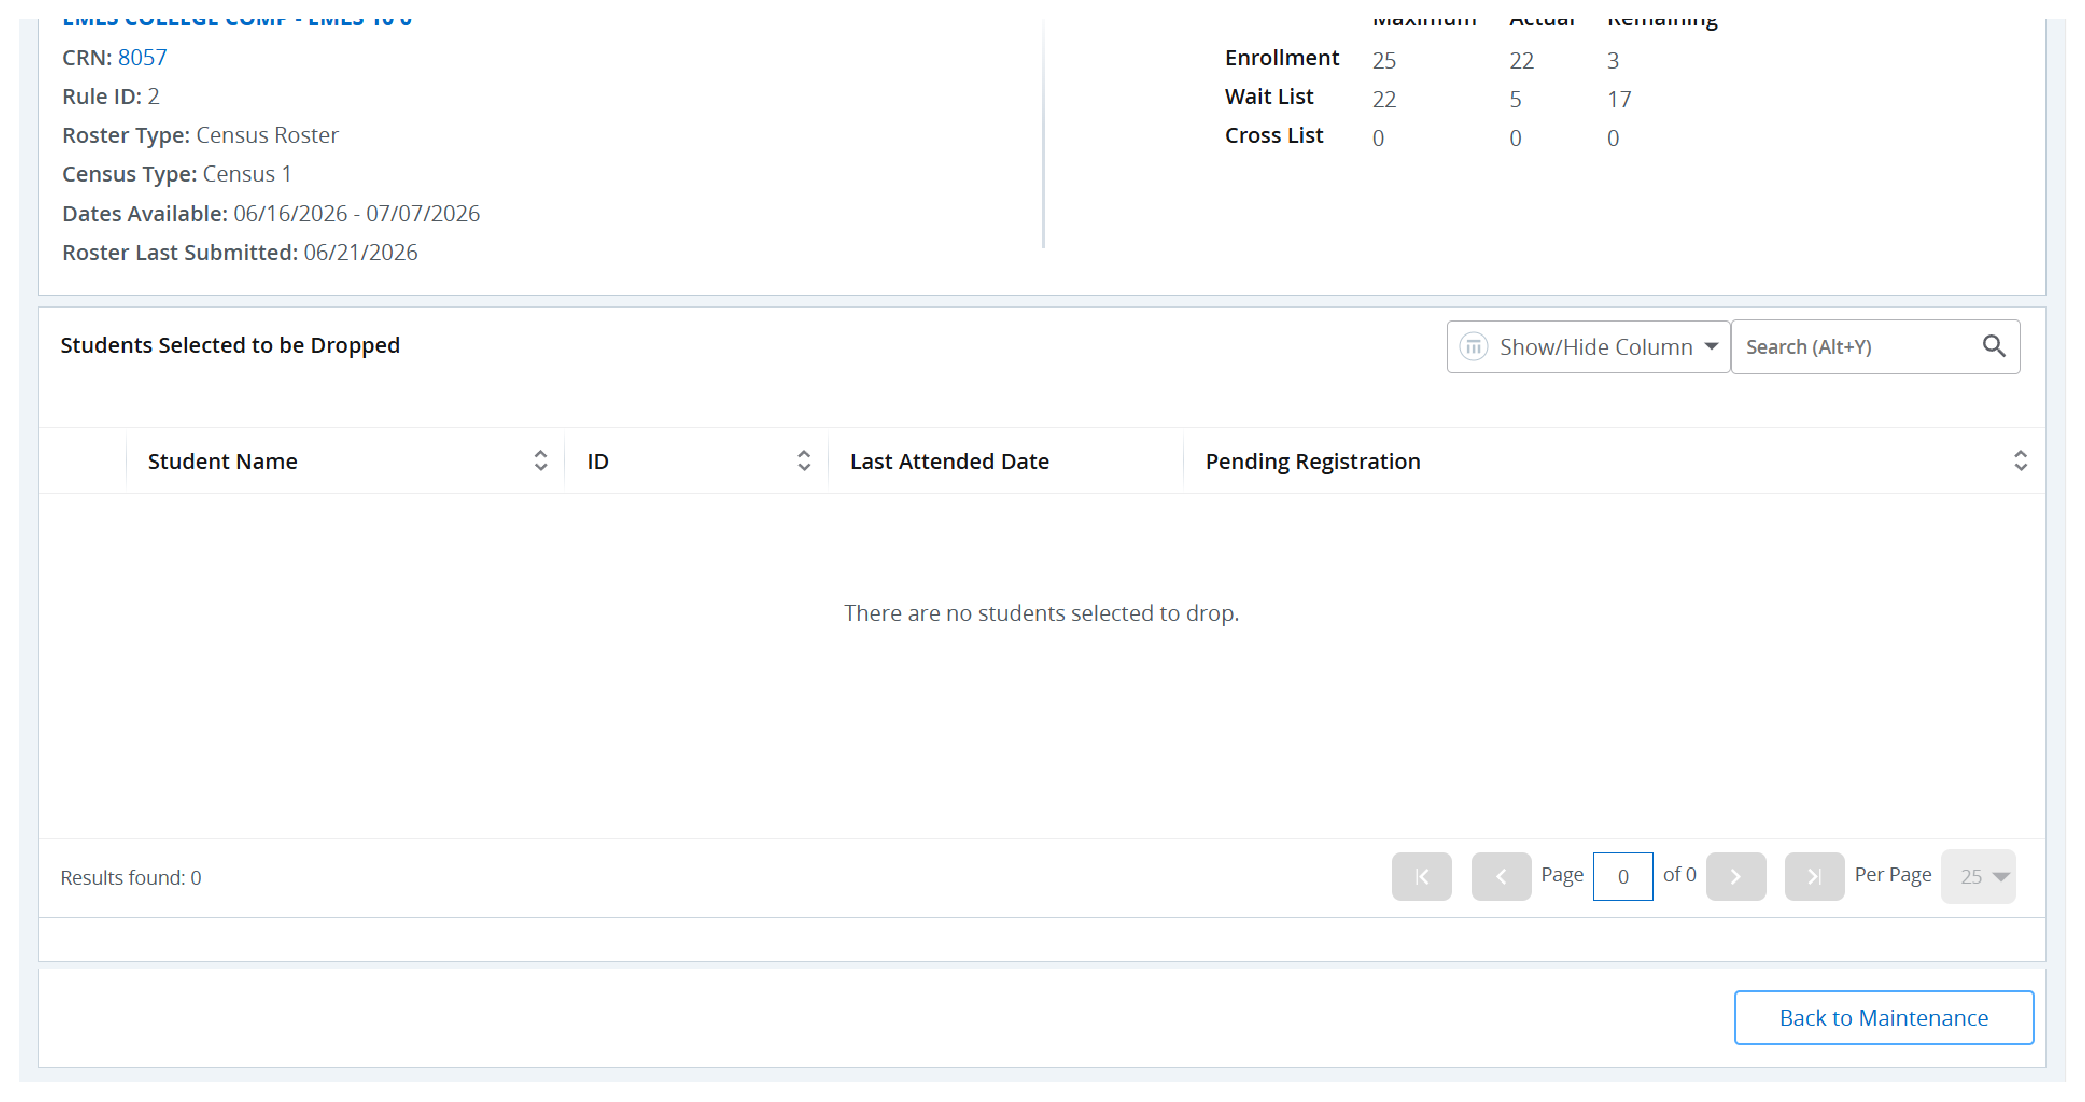
Classes with a completed census roster will now show the date the census was submitted.

This completes the Census/Certify a Roster process.
- Where do I access my faculty tools?
Locate the Faculty Self-Service card and select “Open Faculty Dashboard.”
- Can I cross-list my courses in Banner/Bear Cub Hub?
Because Bear Cub Hub does not have a cross-listing tool, faculty will now cross-list their courses using the native Canvas tool. This tool will be available 2 weeks before the first day of each semester through the end of the first week of the regular semester. For Fall 26, this window will be August 3-21. Since cross-listing erases the "child" course, this limited window of availability is designed to reduce accidental loss of student grades and work.
If you are planning to cross-list your Canvas courses and would like to begin working on your course content now, select one course shell to serve as the "parent" shell and develop your content there. When the cross-listing tool becomes available on August 3rd, follow the instructions and guidance provided on the DE Cross-listing page.
- How do I enter grades?
Mid-term Grades:
Midterm grades used for the evaluation of student progress shall be issued in accordance with regulations established by the faculty and the District. Instructors shall notify students at mid-semester regarding their progress toward successful completion of the course objectives. Midterm grades cannot be entered using the Bear Cub Hub.Canvas Grades:
A tool to move grades from your Canvas gradebook to the Bear Cub Hub grade submission page will become available soon.Needing to Drop Students:
If a student needs to be dropped before submitting grades, send an email to registrar@santarosa.edu.
Final Grades:
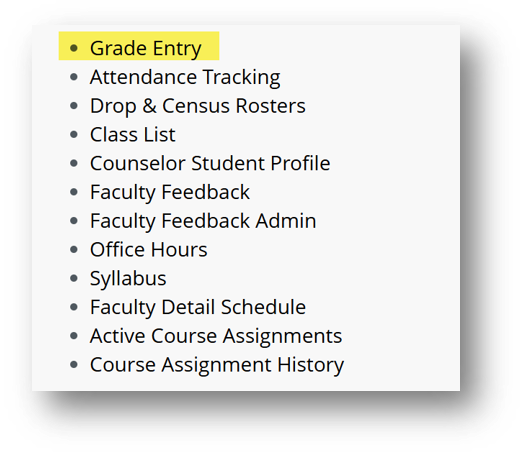
After clicking on the Faculty Self-Service Card, select Grade Entry from your dashboard.
This will take you to My Courses. Click on the white space for the row of the course you wish to submit grades for.
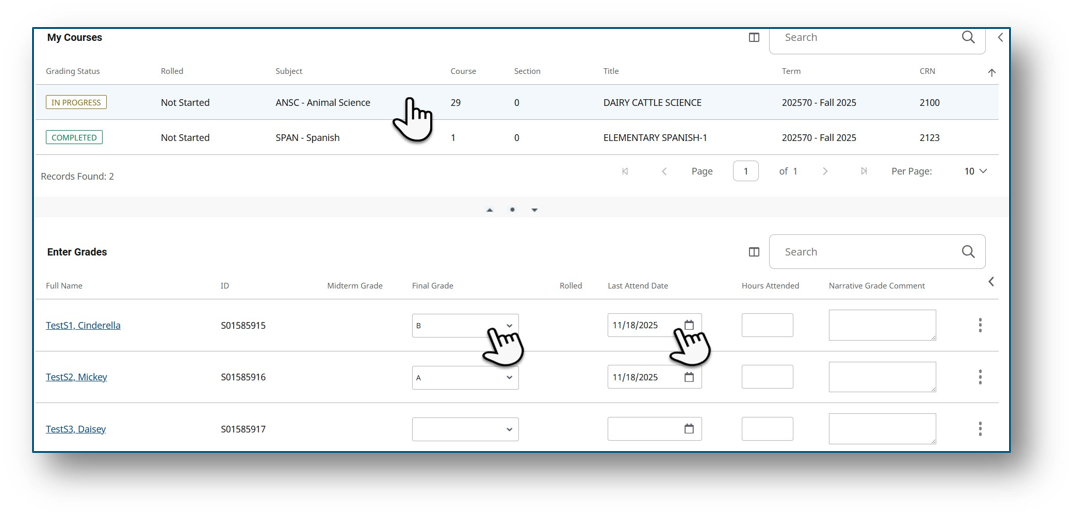
To enter the final grade, use the dropdown menu to select the last attended date, and enter the grade details for each student in the Narrative Grade Comment (optional).
NOTE: you can now choose to assign an Incomplete grade (IB, IC, IPP, INP) without needing to submit an Incomplete Form. The only exception is if you want to assign an Incomplete after the deadline for grade submissions.
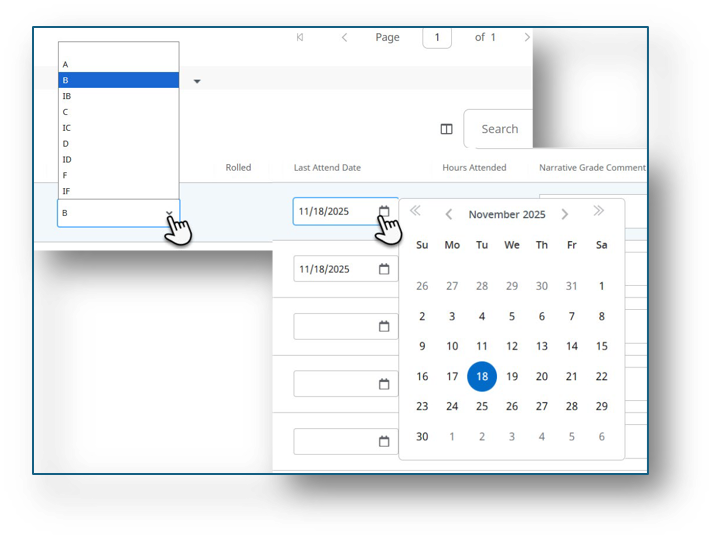
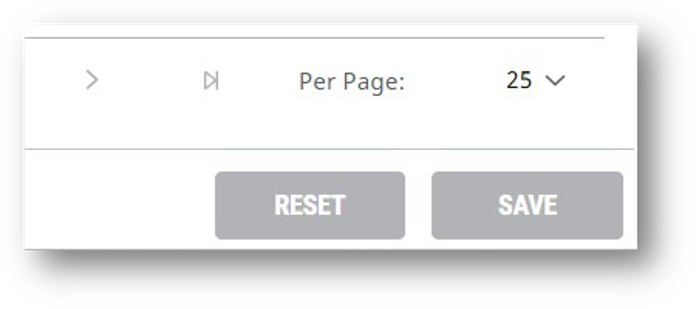
Click SAVE to save your current work. Once all grades have been entered, clicking SAVE will finalize the submissions. Clicking RESET will clear all entries for that class.
Note: After A&R runs their end-of-semester processing, students will be able to see their grades in the Bear Cub Hub student portal.
- Which classes need to take attendance?
Faculty are expected to keep accurate attendance records, but how attendance is tracked depends on the type of course.
- Census courses (credit courses): Faculty record attendance through the census date. Students who never attend or stop participating before census may be dropped. Attendance is also used for financial aid and reporting.
- Positive attendance courses (non-credit & open entry/exit credit courses): Faculty must record the actual hours each student attends every class. These hours are used to calculate state funding and must be accurate for audits.
- Online courses: Logging into the course is not considered attendance. Students must actively participate by submitting assignments, taking quizzes, posting in discussions, or completing other academically related activities.
IF YOU AREN'T SURE WHICH CATEGORY YOUR CLASS FALLS UNDER, contact your department chair.
Record keeping is an important faculty responsibility. It is required that accurate and complete student grade records be kept for a period of three years. Attendance records are only required for positive attendance classes. In these classes, attendance records should also be kept for three years.
Keeping attendance records is recommended for the following reasons:
- Attendance records are important if it becomes necessary to drop a student for non-attendance—in the event of an audit, faculty members must be able to provide the attendance records for each student dropped because of poor attendance.
- Faculty members must indicate the “last date of attendance” when issuing an unsatisfactory grade to students.
Keeping accurate attendance records is important because it supports:
- State funding
- Financial aid eligibility
- Veteran and international student reporting
- Student drops and withdrawals
- State audit requirements
In short, all faculty should keep accurate attendance records, but the method depends on whether the course is census, positive attendance, or online.
- Can I track attendance in Bear Cub Hub?
Yes. After clicking on the Faculty Self-Service Card, use “Attendance Tracking” to record attendance for your courses and update records as needed.
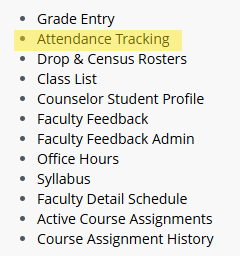
Attendance Tracking allows you to document attendance for each course. Select the Take Roll button to begin.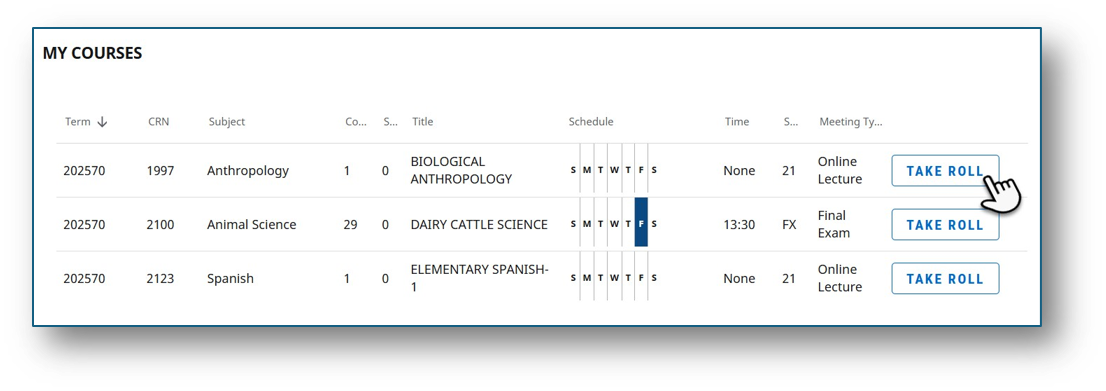 You can use the quick actions drop-down to take attendance for all your students at once or update individual students as needed.
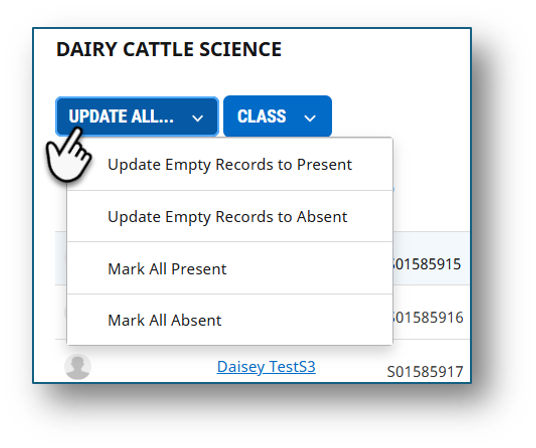
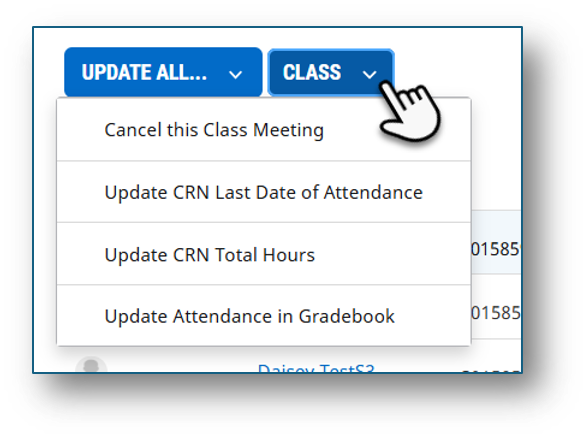
Use the quick actions drop-down to manage class information, such as cancelling a class meeting, entering total hours, or updating attendance in the gradebook.
 When marking all the students present, it will save automatically and appear like this:
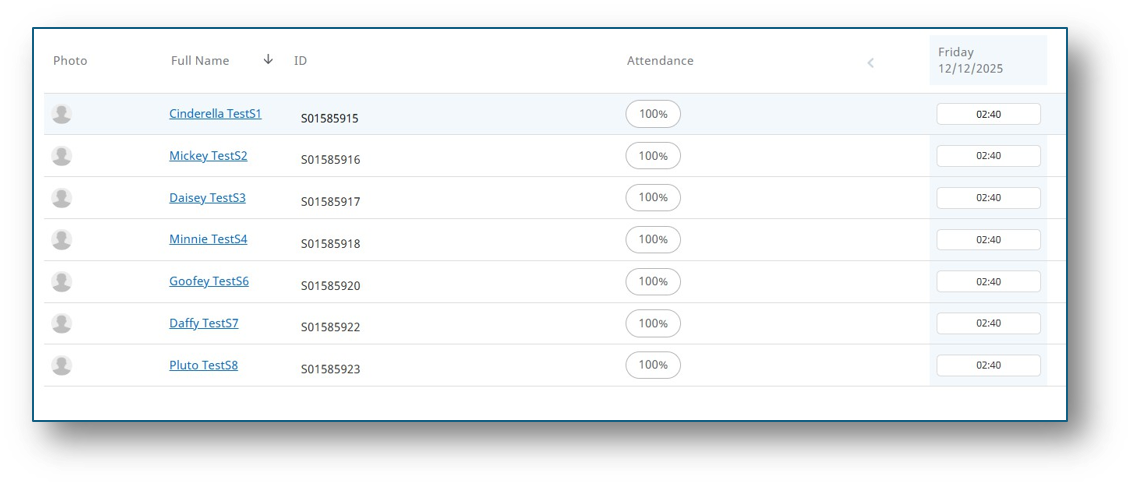
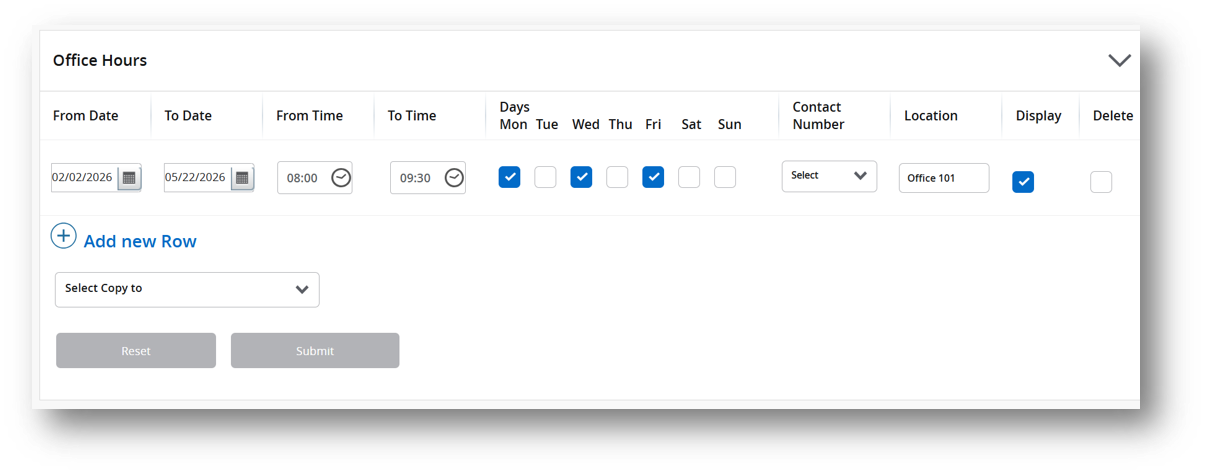
- Where do I manage my office hours?
After clicking on the Faculty Self-Service Card, select “Office Hours” from your dashboard to add, update, or remove office hour availability.
Office Hours is where you configure the Office Hours you want to share with students. This will eventually replace the Office Hours currently on the SRJC Website.

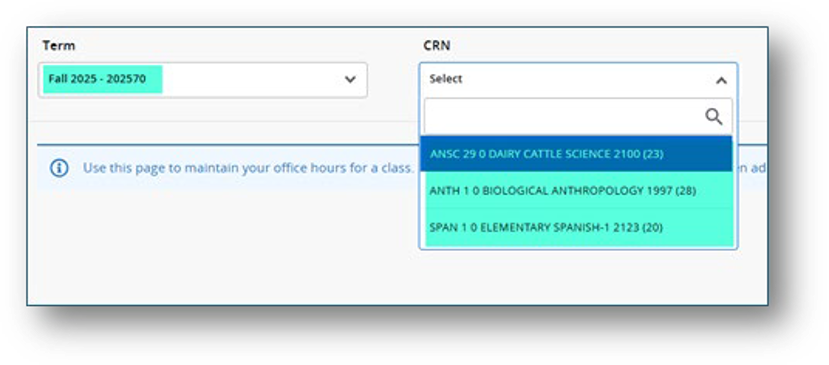
Select the term and course you would like to manage.
Using the areas in the screenshot below, you can display or delete the current office hour setup. Use the Add new row to add to or create a new row if none are already created. If you deselect the display, it will continue to appear on your dashboard for future use. You can always use an existing office hours row and copy it for a particular course; it will display for students when they register, waitlist, or are active students on their class list tied to your teaching courses.
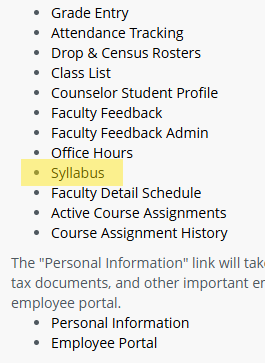
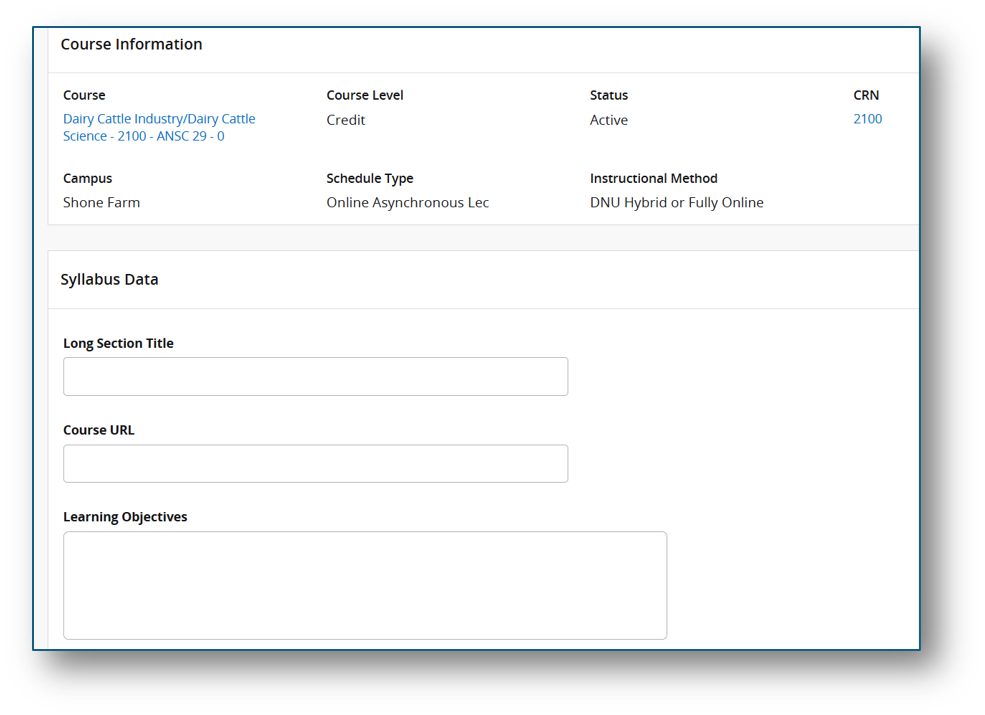
- Can I add syllabus information to the Bear Cub Hub?
Yes, the Syllabus function allows you to add a digital version of the syllabus for each course.
First, select the syllabus option from the Faculty Self-service landing page.
Next, you can select the term and CRN of the course you wish to add syllabus information to.
- Where can I see my teaching schedule?
After clicking on the Faculty Self-Service Card,, use “Faculty Detail Schedule” or “Active Course Assignments” to view course details and schedules.
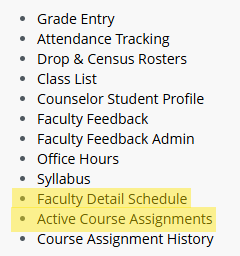
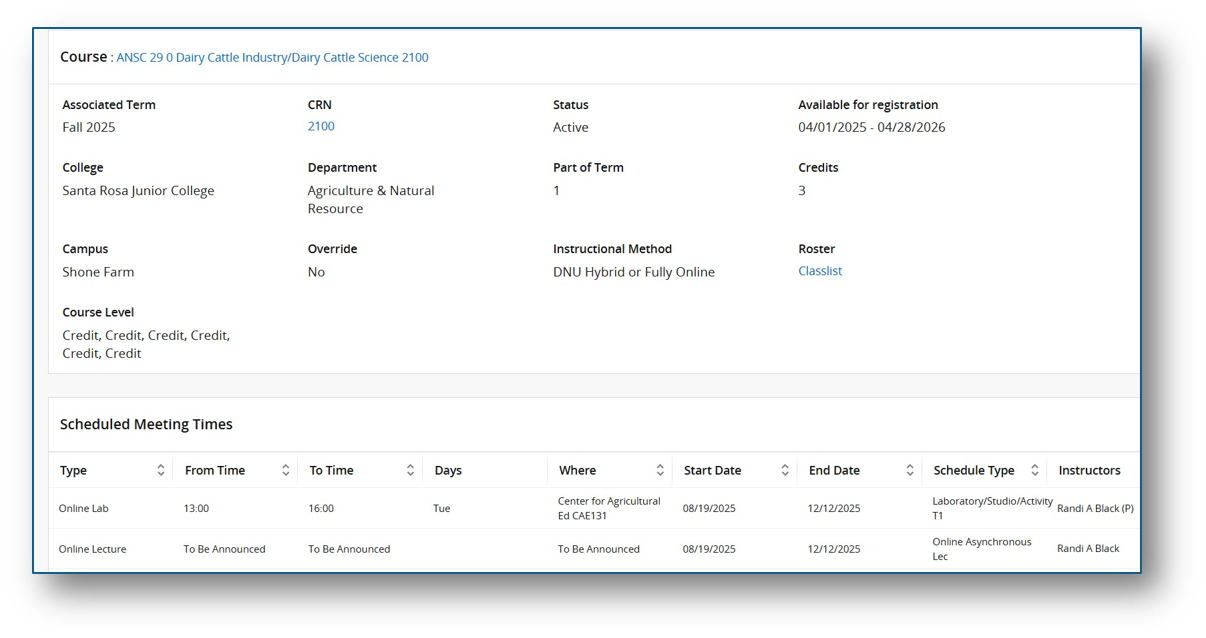
Faculty Detail Schedule
The Faculty Detail Schedule is another view of your assigned courses. This page provides course-level details, including the Department, Campus, etc.
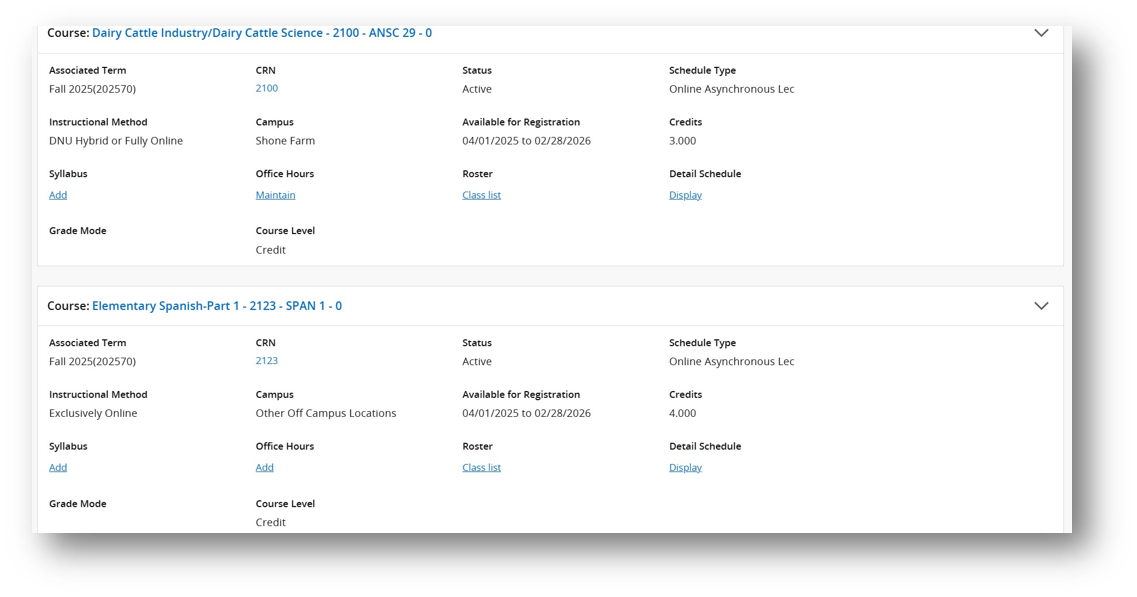
Active Course Assignments
The Active Course Assignments function provides a comprehensive view of your courses, showing office hours, syllabus information, class list, and schedule details in one place.
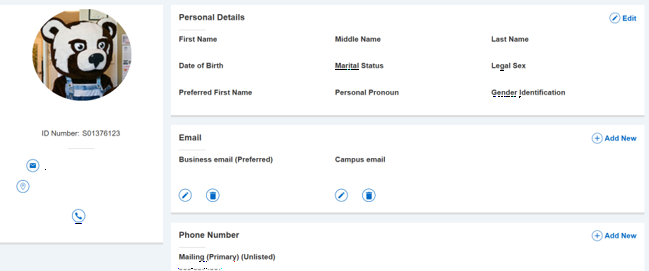
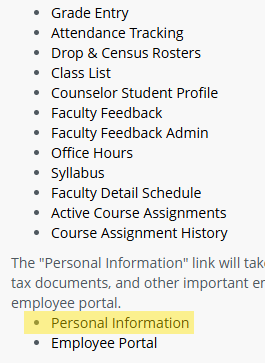
- Can I update my personal information?
Yes. After clicking on the Faculty Self-Service Card, use the “Personal Information” section to update details like your preferred name and pronouns.
Personal Information displays what is stored in Banner related to your demographic information.